Blog

  • Backyard Homesteading on Quarter Acre: A Beginner’s Guide to Self-Sufficiency

    Backyard Homesteading on Quarter Acre: A Beginner’s Guide to Self-Sufficiency

    Imagine growing your own vegetables, raising a few chickens, and harvesting fresh eggs—all within the boundaries of a modest quarter-acre yard. Backyard homesteading on quarter acre is not only possible; it’s a practical, rewarding path to greater food independence, sustainability, and connection with nature. Whether you live in a suburban neighborhood or a semi-rural community, this guide will show you how to transform even a small outdoor space into a productive, thriving homestead.

    This beginner-friendly roadmap covers everything from planning your layout and choosing the right crops to raising livestock and preserving your harvest. You’ll learn how to maximize every square foot, work with your local climate, and build systems that require minimal maintenance but deliver maximum yield. No prior experience? No problem. With smart design and consistent effort, anyone can start their homesteading journey on just a quarter acre.

    Why Quarter-Acre Homesteading Makes Sense for Beginners

    A quarter-acre plot—roughly 10,890 square feet—offers the perfect balance between manageability and productivity. It’s large enough to grow a meaningful amount of food and raise small livestock, yet small enough to avoid overwhelming time or labor demands. For first-time homesteaders, this size reduces the risk of burnout while still delivering tangible results.

    Unlike larger farms, a quarter-acre homestead fits comfortably within most residential zoning laws. Many cities allow backyard chickens, composting, and vegetable gardens as long as they’re kept neat and odor-free. This makes it easier to start without legal hurdles or neighbor complaints.

    Moreover, the financial barrier to entry is low. You don’t need expensive equipment or acres of land. A few raised beds, basic tools, and a small coop can get you started. Over time, your investment pays off through reduced grocery bills, healthier food, and the satisfaction of producing what you consume.

    Planning Your Quarter-Acre Homestead Layout

    The key to successful backyard homesteading on quarter acre lies in intentional design. Every element—from garden beds to animal housing—should serve multiple purposes and fit together like pieces of a puzzle. Start by sketching a rough map of your property, noting sunlight patterns, water access, and existing structures.

    Divide your space into functional zones: growing areas, animal habitats, storage, and living spaces. Aim for efficiency. For example, place your chicken coop near the garden so manure can be easily composted and used as fertilizer. Position compost bins downwind from the house to minimize odors.

    Consider vertical gardening to save ground space. Trellises for beans, cucumbers, and tomatoes allow you to grow more in less area. Raised beds improve soil quality and drainage while reducing weeds. Group plants by water and sunlight needs to simplify maintenance.

    Essential Zones for a Productive Homestead

    • Garden Beds: Allocate 30–40% of your land to vegetable, herb, and fruit production. Rotate crops annually to maintain soil health.
    • Chicken Coop & Run: A small flock of 3–6 hens provides eggs, pest control, and rich manure. Allow at least 10 square feet per bird in the run.
    • Compost Area: Set up a three-bin system for kitchen scraps, yard waste, and manure. This creates nutrient-rich soil amendments.
    • Tool Shed or Storage: Keep tools, seeds, and supplies organized and protected from weather.
    • Water Source: Install rain barrels or a drip irrigation system to conserve water and reduce utility costs.

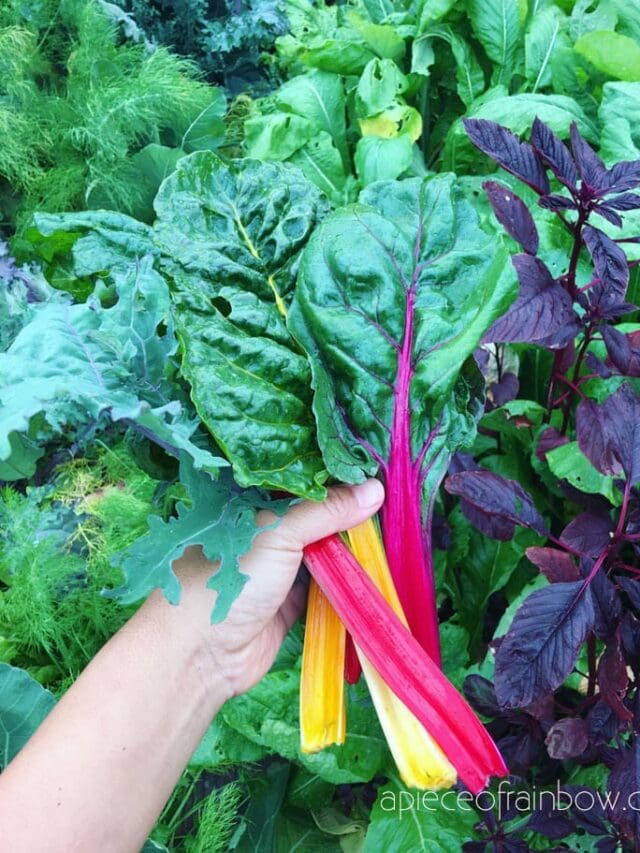
    Choosing the Right Crops for Small-Space Growing

    Not all plants are equally suited to quarter-acre homesteading. Focus on high-yield, space-efficient crops that provide the most nutrition and culinary value per square foot. Prioritize vegetables you already eat regularly to ensure your harvest gets used.

    Leafy greens like spinach, kale, and lettuce grow quickly and can be harvested multiple times. Root vegetables such as carrots, radishes, and beets thrive in deep, loose soil. Compact varieties of tomatoes, peppers, and eggplants produce abundantly in raised beds or containers.

    Herbs like basil, cilantro, thyme, and rosemary require minimal space and enhance home cooking. Consider perennial herbs such as oregano and sage, which return year after year with little care.

    Fruit trees and bushes can also fit into a small homestead. Dwarf apple or peach trees, blueberry bushes, and strawberry patches deliver sweet rewards without consuming excessive space. Train vining plants like grapes or kiwi on fences or arbors to grow vertically.

    Season Extension Techniques

    To maximize your growing season, use cold frames, row covers, or a small greenhouse. These structures protect plants from frost and allow you to start seeds earlier in spring and harvest later into fall. In colder climates, succession planting—sowing new seeds every few weeks—ensures a continuous supply of fresh produce.

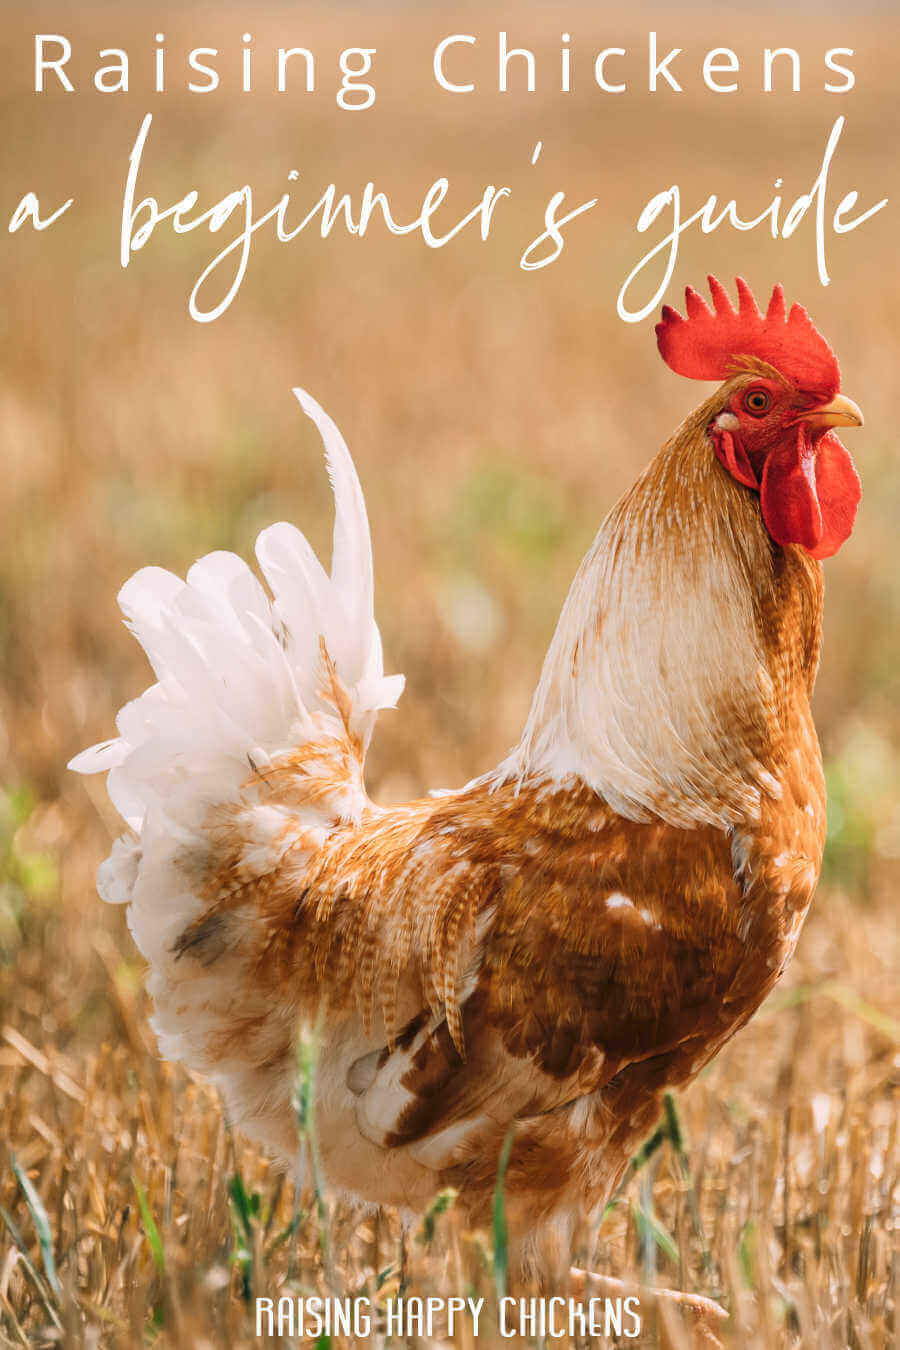
    Raising Livestock on a Quarter Acre

    Animals are a cornerstone of backyard homesteading, even on small plots. Chickens are the most popular choice for beginners due to their low maintenance, egg production, and pest-control benefits. A small flock of 4–6 hens can supply a family with fresh eggs daily.

    Ducks are another excellent option. They are hardy, lay well, and enjoy eating slugs and snails. However, they require more water and can be messier than chickens. Quail are compact and quiet, ideal for urban settings, though their egg yield is smaller.

    If local regulations allow, consider keeping a few rabbits for meat or manure. They require minimal space and reproduce quickly. Goats are possible on a quarter acre but demand more fencing, shelter, and daily attention—best suited for those with prior experience.

    Always check your city or county ordinances before bringing animals home. Some areas restrict roosters, limit flock size, or require permits. Neighbors may have concerns about noise or smell, so maintain clean coops and respectful practices.

    Feeding and Caring for Your Animals

    While commercial feed provides balanced nutrition, supplement with kitchen scraps, garden weeds, and forage. Chickens love leafy greens, fruit peels, and grains. Avoid feeding them avocado, chocolate, or salty foods.

    Provide clean water daily and ensure shelter from predators and extreme weather. Rotate grazing areas if possible to prevent overuse and parasite buildup. Regular health checks help catch issues early.

    Soil Health and Composting: The Foundation of Success

    Healthy soil is the secret to a thriving homestead. Without rich, living soil, even the best-planned garden will struggle. Test your soil to understand its pH and nutrient levels. Most vegetables prefer slightly acidic to neutral soil (pH 6.0–7.0).

    Amend poor soil with organic matter like compost, aged manure, or leaf mold. Avoid synthetic fertilizers, which can harm microbial life and lead to long-term degradation. Instead, build fertility naturally through crop rotation, cover cropping, and mulching.

    Composting turns waste into wealth. Collect kitchen scraps (fruit and vegetable peels, coffee grounds, eggshells) and yard waste (grass clippings, leaves, small branches). Layer green (nitrogen-rich) and brown (carbon-rich) materials in a bin or pile, keep it moist, and turn it occasionally.

    Within 3–6 months, you’ll have dark, crumbly compost ready to enrich your garden. This closed-loop system reduces landfill waste and eliminates the need for store-bought fertilizers.

    Water Management and Conservation

    Water is a precious resource, especially in drought-prone areas. Design your homestead to capture and use water efficiently. Install rain barrels under downspouts to collect roof runoff. Use this free water for irrigation instead of relying solely on the municipal supply.

    Drip irrigation systems deliver water directly to plant roots, minimizing evaporation and runoff. Soaker hoses work well for garden beds and are easy to set up. Water early in the morning or late in the evening to reduce loss from heat.

    Mulching with straw, wood chips, or shredded leaves helps retain soil moisture, suppress weeds, and regulate temperature. A 2–3 inch layer around plants can cut watering needs by up to 50%.

    Consider planting drought-tolerant species like lavender, sage, or succulents in drier sections of your yard. These require little water once established and add beauty and biodiversity.

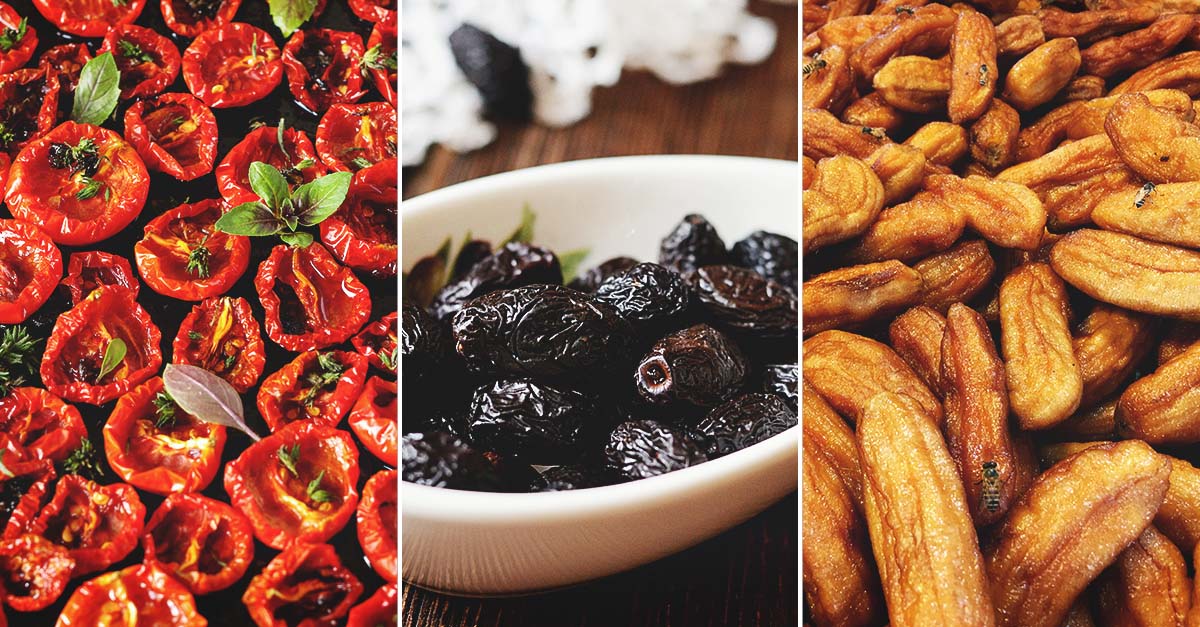
    Preserving Your Harvest: From Garden to Pantry

    Growing food is only half the battle—preserving it ensures you enjoy your harvest year-round. Learn basic techniques like canning, freezing, drying, and fermenting. Each method suits different types of produce and storage needs.

    Canning is ideal for tomatoes, pickles, jams, and soups. Use a water bath canner for high-acid foods and a pressure canner for low-acid items like beans and meats. Always follow tested recipes to ensure safety.

    Freezing preserves flavor and nutrients well. Blanch vegetables before freezing to maintain color and texture. Use freezer-safe containers or vacuum sealers to prevent freezer burn.

    Drying herbs, fruits, and vegetables concentrates flavors and extends shelf life. Use a dehydrator, oven, or sunny windowsill. Store dried goods in airtight jars away from light and heat.

    Fermentation introduces beneficial bacteria and creates probiotic-rich foods like sauerkraut, kimchi, and yogurt. It requires minimal equipment and can be done in small batches.

    Time Management and Realistic Expectations

    Backyard homesteading on quarter acre is rewarding but requires consistent effort. Set realistic goals and avoid trying to do everything at once. Start with a few garden beds and a small flock, then expand as you gain confidence.

    Create a seasonal schedule to stay organized. In spring, focus on planting and preparing beds. Summer demands daily watering and pest monitoring. Fall is for harvesting, preserving, and cleaning up. Winter offers time for planning, tool maintenance, and rest.

    Involve family members to share the workload. Children can help with watering, weeding, or collecting eggs. This builds skills and strengthens connections to food and nature.

    Accept that not every season will be perfect. Pests, weather, and mistakes are part of the learning process. Keep a journal to track what works and what doesn’t. Over time, you’ll develop a rhythm that fits your lifestyle.

    Key Takeaways for Beginner Homesteaders

    • A quarter-acre homestead is ideal for beginners—manageable, productive, and often legally permissible.
    • Design your space with zones for gardening, animals, composting, and storage to maximize efficiency.
    • Choose high-yield, space-saving crops and use vertical gardening to grow more in less area.
    • Start with chickens or ducks for eggs and pest control; check local regulations first.
    • Build healthy soil through composting, mulching, and organic amendments.
    • Conserve water with rain barrels, drip irrigation, and mulch.
    • Preserve your harvest through canning, freezing, drying, or fermenting.
    • Set realistic goals, stay consistent, and learn from each season’s successes and challenges.

    Frequently Asked Questions

    Can I really raise animals on a quarter acre?

    Yes, many people successfully raise chickens, ducks, or rabbits on a quarter-acre plot. The key is choosing the right number and type of animals, providing proper shelter, and following local ordinances. Start small and scale up as you gain experience.

    How much time does backyard homesteading take each week?

    Expect to spend 5–10 hours per week during peak growing season, including watering, weeding, feeding animals, and harvesting. In winter, time drops to 1–3 hours for planning and maintenance. Tasks can be spread across days to fit busy schedules.

    What if my soil is poor or compacted?

    Poor soil is common in urban and suburban areas. Improve it by adding compost, aged manure, or leaf mold. Use raised beds filled with quality soil mix if ground conditions are severely limited. Over time, organic matter will rebuild soil structure and fertility.

    Start Small, Grow Steady

    Backyard homesteading on quarter acre is more than a trend—it’s a return to self-reliance, sustainability, and mindful living. You don’t need vast land or years of experience to begin. With thoughtful planning, consistent care, and a willingness to learn, your small yard can become a source of fresh food, natural beauty, and personal fulfillment.

    Begin with one garden bed, a few seeds, or a single chicken. Celebrate small victories—the first tomato, the first egg, the first jar of homemade jam. Each step forward builds confidence and deepens your connection to the land. Your quarter-acre homestead is not just a piece of property; it’s the foundation of a more intentional, resilient way of life.

  • Best Beginner Chicken Coop Under 300 Dollars: A Complete Guide for First-Time Poultry Keepers

    Best Beginner Chicken Coop Under 300 Dollars: A Complete Guide for First-Time Poultry Keepers

    Starting your backyard chicken journey doesn’t have to break the bank. If you’re searching for the best beginner chicken coop under 300 dollars, you’re in the right place. Whether you’re raising a small flock for fresh eggs or simply want to enjoy the companionship of backyard chickens, finding an affordable, safe, and easy-to-maintain coop is essential. With countless options flooding the market, it’s easy to feel overwhelmed—especially when you’re new to poultry keeping. This guide cuts through the noise to deliver practical, budget-friendly solutions that prioritize your chickens’ well-being without sacrificing quality or functionality.

    We’ve researched, tested, and compared dozens of coops to identify the top choices that deliver excellent value, durability, and ease of use—all under the $300 mark. From compact designs perfect for urban backyards to expandable models that grow with your flock, these coops are ideal for beginners who want reliability without overspending. Read on to discover which coop best fits your space, lifestyle, and chicken-keeping goals.

    Why a Beginner-Friendly Coop Under $300 Matters

    For first-time chicken owners, the initial investment can feel daunting. But a well-designed coop under $300 offers more than just affordability—it provides peace of mind. These coops are typically lightweight, easy to assemble, and built with beginner needs in mind: simple cleaning, predator protection, and adequate ventilation. You don’t need industrial-grade materials or complex features to keep your hens happy and healthy.

    Most beginner coops under $300 are designed for 3 to 6 chickens, making them perfect for small flocks. They often include essential features like roosting bars, nesting boxes, and secure latches—everything you need to get started. Plus, many models are portable, allowing you to move the coop around your yard to give your chickens fresh grazing areas. This mobility also helps prevent soil compaction and parasite buildup.

    Choosing a coop in this price range also minimizes risk. If you decide chicken keeping isn’t for you, you haven’t invested thousands. But if you fall in love with your feathered friends (and most do), you can always upgrade later. The key is starting smart—with a coop that’s functional, safe, and within budget.

    Top Features to Look for in a Beginner Chicken Coop

    Not all coops under $300 are created equal. To ensure you’re getting the best value, focus on these must-have features:

    • Predator-proof construction: Look for sturdy wire mesh (1/2-inch hardware cloth is ideal), secure locks, and a solid base or skids to prevent digging.
    • Easy access for cleaning: Removable trays, hinged roofs, or large doors make daily maintenance simple and stress-free.
    • Proper ventilation: Adequate airflow prevents respiratory issues and keeps ammonia levels low. Vents near the roof and screened windows are essential.
    • Roosting and nesting space: Chickens need elevated roosts to sleep and private, dark nesting boxes for laying eggs.
    • Weather resistance: A waterproof roof and elevated floor protect your flock from rain, snow, and dampness.
    • Portability: Wheels or handles allow you to move the coop easily, which is great for lawn health and chicken safety.

    These features ensure your coop isn’t just cheap—it’s smart. A well-thought-out design saves you time, reduces stress, and keeps your chickens thriving. Avoid coops with flimsy materials, poor ventilation, or tiny doors that make cleaning a nightmare. Your future self (and your hens) will thank you.

    Best Beginner Chicken Coop Under 300 Dollars: Top 5 Picks

    1. Omlet Eglu Cube Chicken Coop – Best Overall Value

    The Omlet Eglu Cube stands out as one of the most innovative and beginner-friendly coops under $300. Made from durable, insulated plastic, it’s easy to clean, weatherproof, and predator-resistant. Its modular design allows you to expand later by adding a run or connecting multiple units. The cube houses up to 4 chickens comfortably and includes a built-in nesting box, roosting bar, and secure automatic door (sold separately).

    What makes the Eglu Cube ideal for beginners? Its simplicity. Assembly takes under an hour, and the smooth surfaces prevent mites and bacteria buildup. The elevated design keeps chickens safe from ground predators, while the insulated shell maintains a stable temperature year-round. Plus, the optional automatic door lets you sleep in on weekends without worrying about closing the coop at dusk.

    While the base model is slightly above $300, frequent sales and bundle deals often bring it within budget. For the quality and convenience it offers, the Omlet Eglu Cube is a top-tier choice for new chicken keepers.

    2. Snap-N-Go 4-6 Hen Mobile Chicken Coop – Best for Mobility

    If you want a coop that moves with your chickens, the Snap-N-Go is a standout. Priced well under $300, this lightweight, all-in-one unit includes a coop, run, and wheels for easy relocation. It’s perfect for small yards where rotating grazing areas is important. The coop fits 4 to 6 hens and features a pull-out tray for quick cleaning, a secure latch system, and a waterproof roof.

    The Snap-N-Go’s design emphasizes practicality. The nesting box is accessible from the outside, so you can collect eggs without disturbing your flock. The wire mesh is strong enough to deter raccoons and foxes, and the elevated floor prevents moisture buildup. Assembly is straightforward, with pre-drilled holes and clear instructions—ideal for first-timers.

    One downside: the plastic components may not last as long as metal or wood in extreme weather. But for the price and mobility, it’s an excellent entry-level option. Just be sure to anchor it during windy days and provide extra shade in summer.

    3. Yard Butler Chicken Coop – Best for DIY Enthusiasts

    The Yard Butler Chicken Coop is a hybrid between a ready-made coop and a DIY project. Sold as a kit under $300, it includes pre-cut, pre-drilled wood panels, hardware, and step-by-step instructions. You assemble it yourself, which saves money and gives you full control over the final build. The finished coop houses 3 to 4 chickens and includes a nesting box, roosting bar, and secure door.

    This coop appeals to hands-on beginners who enjoy building things. The process takes a weekend and teaches valuable skills about coop design and chicken needs. The wooden construction is sturdy and blends naturally into backyard landscapes. Plus, you can customize it later—add a rain cover, extend the run, or paint it to match your garden.

    Keep in mind that untreated wood may require sealing to prevent rot. Also, ensure the wire mesh is hardware cloth, not chicken wire, for true predator protection. With a little effort, the Yard Butler delivers a high-quality, personalized coop at a fraction of the cost of pre-built wooden models.

    4. Little Giant Premium Chicken Coop – Best for Durability

    For those who prefer metal over plastic or wood, the Little Giant Premium Chicken Coop is a solid choice. Constructed from galvanized steel, it resists rust, corrosion, and chewing predators. Priced just under $300, it’s built to last and requires minimal maintenance. The coop fits 3 to 4 hens and includes a removable tray, secure latches, and a sloped roof for rain runoff.

    The metal frame is incredibly sturdy, making it ideal for areas with high predator pressure. The galvanized coating protects against the elements, and the tight mesh keeps out rats, weasels, and snakes. Cleaning is a breeze—just hose down the tray and wipe the surfaces. The coop also has a large front door for easy access and a nesting box with a lift-up lid.

    The main drawback? Weight. This coop isn’t portable, so choose your location carefully. It’s best suited for permanent setups in secure backyards. But if durability and security are your top priorities, the Little Giant delivers unmatched value in its price range.

    5. Petsfit 4-6 Hen Chicken Coop – Best for Small Spaces

    The Petsfit 4-6 Hen Chicken Coop is a compact, all-in-one solution perfect for urban or suburban yards. At under $300, it combines a coop and run in a space-saving design. The unit includes a nesting box, roosting bar, and secure door, all housed in a weather-resistant wooden frame with metal reinforcement. It’s ideal for 4 to 6 chickens and can be placed on grass, concrete, or decking.

    What sets Petsfit apart is its thoughtful layout. The nesting box is elevated and accessible from the side, while the run provides ample space for scratching and foraging. The roof is sloped and waterproof, and the floor is raised to prevent dampness. Assembly is straightforward, with labeled parts and clear instructions.

    This coop is a great middle ground between affordability and functionality. It’s not as mobile as the Snap-N-Go or as durable as the Little Giant, but it strikes a balance that works for most beginners. Just ensure you provide shade and extra ventilation in hot climates.

    How to Choose the Right Coop for Your Needs

    With so many options, how do you pick the best beginner chicken coop under 300 dollars for your situation? Start by answering these questions:

    • How many chickens do you plan to keep? (Most coops list capacity, but allow 3–4 sq ft per bird inside and 8–10 sq ft in the run.)
    • Do you have space to move the coop, or will it stay in one place?
    • What’s your local climate like? (Extreme heat, cold, or rain may require extra insulation or ventilation.)
    • Are predators a major concern in your area? (Raccoons, foxes, and hawks demand stronger materials and locks.)
    • How much time can you dedicate to daily maintenance?

    Your answers will guide your choice. For example, if you live in a rainy region, prioritize a coop with a sloped, waterproof roof. If you’re in a city with limited space, go for a compact, vertical design. And if you’re unsure about long-term commitment, choose a portable model you can resell easily.

    Also, consider future expansion. Some coops allow you to add runs or connect multiple units. Others are standalone and harder to modify. Think ahead—your flock might grow, or you might want to add a brooder or compost system nearby.

    Key Takeaways: What Every Beginner Should Know

    • The best beginner chicken coop under 300 dollars balances affordability, safety, and ease of use.
    • Look for essential features: predator-proof mesh, easy cleaning, proper ventilation, and weather resistance.
    • Top picks include the Omlet Eglu Cube (best overall), Snap-N-Go (most portable), Yard Butler (DIY-friendly), Little Giant (most durable), and Petsfit (best for small spaces).
    • Always match the coop size to your flock—overcrowding leads to stress and health issues.
    • Portability, expandability, and local climate should influence your final decision.
    • A well-chosen coop under $300 can last years and provide a solid foundation for your chicken-keeping journey.

    FAQ: Common Questions About Beginner Chicken Coops

    Can I really find a good chicken coop under $300?

    Yes! Many high-quality, beginner-friendly coops are available under $300. While they may not have all the bells and whistles of premium models, they include the essential features needed to keep chickens safe and healthy. Brands like Omlet, Snap-N-Go, and Little Giant offer reliable options in this price range.

    How many chickens can a coop under $300 comfortably house?

    Most coops under $300 are designed for 3 to 6 chickens. Always follow the general rule of 3–4 square feet of indoor space per bird and 8–10 square feet in the outdoor run. Overcrowding leads to aggression, disease, and poor egg production.

    Do I need to assemble the coop myself?

    It depends on the model. Some coops come fully assembled, while others require DIY setup. Kits like the Yard Butler include pre-cut parts and instructions, making assembly manageable for beginners. If you’re not handy, look for coops with minimal assembly or professional delivery options.

    Final Thoughts: Start Smart, Stay Within Budget

    Finding the best beginner chicken coop under 300 dollars doesn’t mean compromising on quality. With the right research, you can secure a safe, functional, and durable home for your flock without overspending. The coops highlighted in this guide offer excellent value, catering to different needs—whether you prioritize mobility, durability, or ease of assembly.

    Remember, your first coop is just the beginning. As you gain experience, you’ll learn what works best for your chickens and your lifestyle. Starting with a budget-friendly, beginner-appropriate model allows you to test the waters, build confidence, and scale up later if desired. The most important thing is providing a secure, clean, and comfortable environment where your hens can thrive.

    So go ahead—take the leap. With one of these top-rated coops under $300, you’re well on your way to enjoying fresh eggs, natural pest control, and the simple joy of backyard chickens.

  • How to Set Up a Drip Irrigation System for Raised Beds

    How to Set Up a Drip Irrigation System for Raised Beds

    Watering raised garden beds efficiently can mean the difference between thriving plants and wasted effort. If you’re tired of dragging hoses or guessing when your vegetables need water, it’s time to consider a drip irrigation system for raised beds. This targeted watering method delivers moisture directly to plant roots, reduces evaporation, and saves time—making it ideal for small to medium-sized gardens. Whether you’re growing tomatoes, lettuce, or herbs, setting up a drip irrigation system ensures consistent hydration with minimal waste.

    In this guide, you’ll learn exactly how to design, install, and maintain a drip irrigation system tailored specifically for raised garden beds. From choosing the right components to laying out tubing and scheduling watering times, every step is explained clearly so even beginners can succeed. By the end, you’ll have a reliable, low-maintenance watering solution that supports healthy growth and conserves water.

    Why Drip Irrigation Is Perfect for Raised Beds

    Raised beds offer excellent drainage and soil control, but they also dry out faster than in-ground gardens. Traditional sprinklers often wet foliage, promoting fungal diseases, while hand-watering is inconsistent and time-consuming. Drip irrigation solves these problems by delivering water slowly and directly to the root zone.

    This method uses significantly less water—up to 50% less than overhead watering—because it minimizes runoff and evaporation. It also prevents soil compaction and keeps leaves dry, reducing the risk of pests and diseases. For gardeners focused on sustainability and efficiency, drip systems are a smart long-term investment.

    Another advantage is automation. Once installed, your system can run on a timer, freeing you from daily watering chores. This is especially helpful during hot summers or when you’re away from home. Plus, because water is applied precisely where needed, weeds receive less moisture, giving your crops a competitive edge.

    Essential Components of a Drip Irrigation System

    Before you start installing, it’s important to understand the core parts of a drip irrigation setup. Each component plays a specific role in ensuring water flows smoothly and reaches your plants effectively.

    Water Source and Backflow Preventer

    Your system begins at the water source—typically an outdoor faucet or hose bib. To protect your drinking water supply, always install a backflow preventer. This device stops contaminated water from flowing backward into your household plumbing, which is required by most local codes.

    Pressure Regulator

    Drip systems operate at low pressure (usually 20–30 PSI), much lower than standard household water pressure. A pressure regulator reduces incoming pressure to a safe level, preventing damage to tubing and emitters. Without one, your system could leak or burst under high pressure.

    Filter

    Even clean tap water can contain sediment that clogs tiny emitter holes. A mesh filter (typically 120–150 mesh) traps debris before it enters the tubing. For well water or recycled sources, a filter is absolutely essential to maintain system performance.

    Mainline Tubing

    This is the primary hose that carries water from the source to your raised beds. Use ½-inch poly tubing for most home gardens—it’s flexible, durable, and easy to work with. Avoid using soaker hoses as mainlines; they’re designed for direct soil contact, not distribution.

    Drip Lines and Emitters

    From the mainline, smaller ¼-inch tubing branches off to individual plants or rows. You can use pre-punched drip lines with built-in emitters or add inline emitters manually. Choose emitters based on plant needs: ½-gallon-per-hour (GPH) for small herbs, 1 GPH for vegetables, and 2 GPH for larger plants like squash.

    End Caps and Connectors

    End caps seal the ends of tubing to maintain pressure. Use barbed or compression fittings to connect different sections. For corners or T-junctions, use appropriate connectors to keep the layout neat and functional.

    Planning Your Drip Irrigation Layout

    A well-designed layout ensures even water distribution and avoids over- or under-watering. Start by measuring your raised beds and sketching a simple diagram. Note the location of each plant and group them by water needs—leafy greens need less than fruiting plants like peppers or cucumbers.

    For single-row beds, run a mainline along one side and branch off with ¼-inch tubing to each plant. In wider beds (over 3 feet), consider running two parallel drip lines to cover the entire root zone. Avoid placing emitters too close to stems; aim for the drip line—the outer edge of the plant’s canopy—where most roots absorb water.

    If your beds are on a slope, install the mainline at the highest point and use pressure-compensating emitters to ensure uniform flow. These emitters deliver the same amount of water regardless of elevation changes, which is crucial for consistent hydration.

    Also, plan for future expansion. Leave extra tubing coiled near the water source so you can easily add new beds or adjust spacing as your garden evolves.

    Step-by-Step Installation Guide

    Now that you’ve planned your layout, it’s time to install the system. Follow these steps for a clean, functional setup.

    Step 1: Assemble the Header Assembly

    Attach the backflow preventer, pressure regulator, and filter to your outdoor faucet in that order. Use Teflon tape on threaded connections to prevent leaks. Then connect the ½-inch mainline tubing to the filter outlet using a hose connector.

    Step 2: Lay Out the Mainline

    Run the mainline from the water source to the first raised bed. Secure it with landscape staples every few feet to keep it in place. If crossing pathways, bury the tubing slightly or use protective conduit.

    Step 3: Branch to Individual Beds

    At each bed, use a ½-inch to ¼-inch adapter to connect smaller tubing. Run this tubing along the length of the bed, placing emitters near each plant. Use goof plugs or punch tools to create holes in the ¼-inch line if using inline emitters.

    Step 4: Install Emitters and End Caps

    Push emitters into the tubing or snap them into pre-punched holes. Make sure they’re snug but not over-tightened. Once all emitters are in place, cap the end of each line with an end cap. Flush the system by briefly turning on the water to remove air and debris.

    Step 5: Test and Adjust

    Turn on the system and check for leaks, uneven flow, or dry spots. Adjust emitter placement or add more if needed. Use a timer to automate watering—most systems benefit from short, frequent sessions (15–30 minutes) rather than long, infrequent ones.

    Choosing the Right Timer and Watering Schedule

    Automation is one of the biggest benefits of drip irrigation. A digital timer lets you set precise watering times and durations, ensuring your plants get consistent moisture without daily attention.

    Look for a timer with multiple programs and battery backup. Some models even connect to Wi-Fi, allowing remote control via smartphone apps. For raised beds, a basic mechanical timer works well and is budget-friendly.

    Watering frequency depends on climate, soil type, and plant stage. In hot, dry weather, water every 1–2 days. In cooler or rainy periods, reduce to 2–3 times per week. Seedlings need light, frequent watering, while established plants prefer deeper, less frequent sessions.

    Morning watering is ideal—it reduces evaporation and gives plants time to absorb moisture before the heat of the day. Avoid evening watering, as wet foliage overnight can encourage mold and mildew.

    Maintenance Tips to Keep Your System Running Smoothly

    Even the best drip systems require occasional upkeep. Regular maintenance prevents clogs, leaks, and performance issues.

    Inspect emitters monthly for blockages. If water flow is weak, remove the emitter and flush it under running water. Soak clogged parts in vinegar to dissolve mineral buildup.

    Check tubing for kinks, cracks, or animal damage. Replace damaged sections promptly. At the end of each growing season, drain the system and store components indoors to prevent freezing and UV degradation.

    Clean the filter every 1–2 months, or more often if using well water. Replace it annually to ensure optimal performance. Also, flush the entire system at the start of each season to clear out sediment.

    Finally, monitor plant health. Yellowing leaves or stunted growth may indicate underwatering, while soggy soil suggests overwatering. Adjust your schedule as needed based on plant response and weather conditions.

    Common Mistakes to Avoid

    Even experienced gardeners make errors when setting up drip irrigation. Avoid these pitfalls to save time and frustration.

    One common mistake is using the wrong emitter flow rate. Too high, and you’ll waterlog the soil; too low, and plants won’t get enough moisture. Match emitter GPH to plant size and soil type—sandy soils drain faster and may need higher flow rates.

    Another issue is poor layout design. Overlapping emitters or placing them too far apart leads to uneven watering. Always map your system before installing and test it thoroughly.

    Skipping the pressure regulator is a costly error. High pressure can rupture tubing and blow out emitters within minutes. Always include this component, even if your water pressure seems low.

    Finally, don’t forget to winterize your system in colder climates. Water left in tubing can freeze, expand, and crack components. Drain and disconnect the system before the first frost.

    Key Takeaways

    • Drip irrigation delivers water directly to plant roots, reducing waste and promoting healthy growth in raised beds.
    • Essential components include a backflow preventer, pressure regulator, filter, mainline tubing, drip lines, and emitters.
    • Plan your layout based on plant water needs and bed dimensions, using pressure-compensating emitters on slopes.
    • Install the system step by step: assemble the header, lay tubing, add emitters, and test for leaks.
    • Use a timer to automate watering and adjust schedules based on season, weather, and plant stage.
    • Maintain your system by cleaning filters, checking for clogs, and winterizing in cold climates.

    FAQ

    How much does it cost to set up a drip irrigation system for raised beds?

    Basic kits start around $30–$50 for a single bed, while larger setups with timers and multiple zones can cost $100–$200. DIY installations using individual components may be more economical and customizable.

    Can I use drip irrigation for container plants in raised beds?

    Yes. Use micro-sprayers or individual emitters for containers. Connect them to the main system with ¼-inch tubing and adjust flow rates based on pot size and plant needs.

    Will a drip system work with organic mulch?

    Absolutely. In fact, mulch enhances drip irrigation by retaining soil moisture and reducing evaporation. Just ensure emitters are placed under the mulch, not buried, to allow water to flow freely.

    Conclusion

    Setting up a drip irrigation system for raised beds is a practical, eco-friendly way to keep your garden hydrated with minimal effort. By delivering water precisely where it’s needed, you’ll grow stronger plants, conserve resources, and spend less time watering. With the right components, thoughtful planning, and regular maintenance, your system will perform reliably season after season.

    Whether you’re a beginner or an experienced gardener, now is the perfect time to make the switch. Start small, learn as you go, and enjoy the rewards of a healthier, more productive garden. Your plants—and your back—will thank you.

  • How to Water Vegetable Garden Efficiently in Hot Weather

    How to Water Vegetable Garden Efficiently in Hot Weather

    When temperatures soar, your vegetable garden faces a critical challenge: staying hydrated without wasting water. Efficient watering in hot weather isn’t just about frequency—it’s about timing, method, and understanding your plants’ needs. If you’ve noticed wilting leaves, cracked soil, or stunted growth during heatwaves, you’re likely not watering your vegetable garden efficiently in hot weather. The good news? With the right strategies, you can keep your crops thriving while conserving water and reducing stress on your plants.

    Why Efficient Watering Matters in Extreme Heat

    Hot weather accelerates evaporation, dries out soil quickly, and increases plant transpiration. Without proper hydration, vegetables like tomatoes, peppers, and cucumbers suffer from blossom end rot, leaf curl, or premature bolting. Overwatering, on the other hand, can lead to root rot and fungal diseases. The key is balance—delivering the right amount of water, at the right time, in the right way.

    Efficient watering ensures that moisture reaches the root zone where it’s needed most. It also minimizes runoff, reduces water bills, and supports sustainable gardening practices. Whether you’re growing in raised beds, containers, or traditional rows, adapting your watering routine for heat is essential for a healthy, productive harvest.

    Best Time to Water Your Vegetable Garden in Hot Weather

    Timing is everything when it comes to watering efficiently in hot conditions. The ideal window is early morning, between 6 a.m. and 8 a.m. At this time, temperatures are cooler, humidity is higher, and wind speeds are lower—conditions that reduce evaporation and allow water to soak deep into the soil.

    Watering in the evening might seem logical, but it can leave foliage damp overnight, creating a breeding ground for mildew and fungal infections. Midday watering is the least effective, as much of the water evaporates before reaching plant roots. Stick to early mornings for maximum absorption and plant health.

    Signs Your Garden Needs Water

    Even with a schedule, it’s important to observe your garden. Look for these indicators that your vegetables are thirsty:

    • Soil feels dry 2–3 inches below the surface
    • Leaves appear wilted, especially in the morning
    • Stems feel soft or limp
    • Fruits or leaves develop cracks or discoloration

    Regular soil checks with your finger or a moisture meter help you avoid guesswork. Remember, different vegetables have different needs—leafy greens require consistent moisture, while root crops like carrots prefer deeper, less frequent watering.

    Watering Methods That Maximize Efficiency

    Not all watering techniques are created equal, especially under intense heat. The goal is to deliver water directly to the root zone with minimal waste. Here are the most effective methods for hot-weather gardening:

    Drip Irrigation: The Gold Standard

    Drip irrigation systems are the most efficient way to water a vegetable garden in hot weather. They use a network of tubes and emitters to release water slowly at the base of each plant. This method reduces evaporation, prevents leaf wetness, and ensures deep soil penetration.

    Install a timer to automate early morning watering. Pair it with a moisture sensor for even greater precision. While the initial setup requires investment, drip systems save water, time, and labor in the long run—especially in large or densely planted gardens.

    Soaker Hoses: A Budget-Friendly Alternative

    Soaker hoses are porous rubber or fabric hoses that “sweat” water along their length. Lay them along plant rows and cover with mulch to enhance efficiency. They’re ideal for raised beds and row crops like beans, squash, and lettuce.

    Unlike sprinklers, soaker hoses deliver water at soil level, reducing waste and fungal risks. They’re easy to install and can be connected to a timer for hands-free operation. Just ensure they’re not kinked or blocked, which can lead to uneven watering.

    Hand Watering: When Precision Matters

    For small gardens or container-grown vegetables, hand watering with a watering can or hose nozzle gives you full control. Use a wand attachment to direct water to the base of plants without wetting foliage.

    Focus on slow, deep watering rather than quick sprinkles. A thorough soak every few days is better than daily light watering, which encourages shallow root growth. Always water until the soil is moist several inches deep.

    Mulching: The Secret to Retaining Moisture

    Mulch is your best ally in hot weather. A 2–4 inch layer of organic material—such as straw, shredded leaves, grass clippings, or compost—acts as a protective barrier over the soil. It reduces evaporation, moderates soil temperature, and suppresses weeds that compete for water.

    Apply mulch after the soil has warmed in spring and avoid piling it against plant stems to prevent rot. In containers, use coconut coir or bark mulch to retain moisture without compacting the soil. Replenish mulch as it breaks down throughout the season.

    Best Mulch Types for Hot Climates

    • Straw: Lightweight and excellent for vegetable beds; doesn’t compact easily.
    • Compost: Adds nutrients while retaining moisture; ideal for nutrient-hungry crops.
    • Grass Clippings: Free and effective, but use only if not treated with herbicides.
    • Wood Chips: Long-lasting but best for pathways; can tie up nitrogen if used directly around plants.

    How Much Water Do Vegetables Need in Heat?

    Most vegetable gardens need about 1–1.5 inches of water per week under normal conditions. In hot weather, this can double, especially during prolonged heatwaves or drought. However, requirements vary by plant type, soil, and stage of growth.

    Tomatoes, cucumbers, and squash are heavy drinkers and may need daily watering in extreme heat. Lettuce, spinach, and other leafy greens dry out quickly and benefit from consistent moisture. Root vegetables like carrots and beets prefer deep, infrequent watering to encourage downward root development.

    Use a rain gauge or tuna can to measure actual water output. Place several containers around your garden and run your irrigation for 30 minutes. Measure the collected water to determine how long to water for a full inch.

    Adjusting for Soil Type

    Soil composition plays a major role in water retention. Sandy soils drain quickly and may need more frequent watering, while clay soils hold moisture longer but can become waterlogged. Loamy soils offer the best balance.

    Improve water efficiency by amending soil with compost or well-rotted manure. These organic materials increase the soil’s ability to retain moisture and nutrients, reducing the need for frequent watering.

    Container Gardening Tips for Hot Weather

    Growing vegetables in pots presents unique challenges in hot weather. Containers heat up faster, dry out more quickly, and have limited root space. Without proper care, container plants can suffer from heat stress and dehydration.

    Choose larger pots—at least 5 gallons for most vegetables—to provide adequate soil volume. Dark-colored containers absorb more heat; opt for light-colored or fabric pots to keep roots cooler. Group pots together to create a microclimate that reduces evaporation.

    Water container gardens daily, sometimes twice a day in extreme heat. Check soil moisture by inserting your finger an inch deep. If it’s dry, it’s time to water. Consider self-watering containers or adding water reservoirs to reduce frequency.

    Self-Watering Containers: A Smart Solution

    Self-watering pots use a reservoir system that allows plants to draw water as needed. They’re ideal for busy gardeners or those in scorching climates. Fill the reservoir every few days, and your plants stay hydrated without constant monitoring.

    These containers are especially useful for tomatoes, peppers, and herbs, which benefit from consistent moisture. They also reduce the risk of overwatering, as excess water drains away.

    Avoiding Common Watering Mistakes

    Even experienced gardeners make errors when watering in hot weather. Avoid these common pitfalls to keep your vegetable garden healthy:

    • Watering the leaves: Wet foliage invites disease. Always target the soil, not the plant.
    • Shallow watering: Light sprinkles encourage shallow roots. Aim for deep, infrequent soaks.
    • Inconsistent schedules: Erratic watering stresses plants. Stick to a routine based on soil moisture.
    • Ignoring weather forecasts: Skip watering before rain. Adjust for heat advisories or drought warnings.

    Also, avoid using cold water from outdoor hoses on hot days. Let the water sit in the sun for a few hours or use a hose reel with insulation to prevent shocking plant roots.

    Using Technology to Improve Watering Efficiency

    Smart gardening tools can revolutionize how you water your vegetable garden in hot weather. Soil moisture sensors, smart timers, and weather-based irrigation controllers take the guesswork out of watering.

    Moisture sensors measure real-time soil conditions and send alerts to your phone when watering is needed. Smart timers adjust schedules based on rainfall, temperature, and humidity. Some systems even integrate with home assistants for voice control.

    While these tools require an upfront investment, they save water, prevent overwatering, and give you peace of mind—especially if you travel during summer months.

    DIY Watering Hacks for Budget Gardeners

    You don’t need expensive gear to water efficiently. Try these low-cost solutions:

    • Repurpose plastic bottles as slow-drip irrigators—poke holes in the cap and bury them near plant roots.
    • Use a bucket with a spigot to hand-water large areas quickly.
    • Collect rainwater in barrels for chemical-free irrigation.
    • Place shallow trays under pots to catch runoff and allow reabsorption.

    These simple tricks reduce waste and keep your garden hydrated without breaking the bank.

    Key Takeaways

    • Water your vegetable garden early in the morning to reduce evaporation and prevent disease.
    • Use drip irrigation or soaker hoses for efficient, targeted watering.
    • Apply 2–4 inches of organic mulch to retain soil moisture and regulate temperature.
    • Adjust watering frequency based on plant type, soil, and weather conditions.
    • Check soil moisture regularly—don’t rely solely on a schedule.
    • Avoid wetting leaves and prioritize deep, infrequent watering over light sprinkles.
    • Consider smart tools or DIY solutions to improve efficiency and save time.

    FAQ

    How often should I water my vegetable garden in 90°F+ weather?

    In extreme heat, most vegetable gardens need watering every 1–2 days, depending on soil and plant type. Check soil moisture 2–3 inches down—if it’s dry, it’s time to water. Container gardens may need daily or even twice-daily watering.

    Can I water my garden at night in hot weather?

    It’s not recommended. Night watering leaves foliage wet for extended periods, increasing the risk of fungal diseases like powdery mildew. Early morning is the best time to water efficiently and safely.

    What’s the best way to water tomatoes in hot weather?

    Use drip irrigation or a soaker hose to deliver water directly to the base of the plant. Water deeply 2–3 times per week, ensuring the soil stays consistently moist but not soggy. Mulch around the base to retain moisture and prevent blossom end rot.

    Conclusion

    Watering your vegetable garden efficiently in hot weather is both an art and a science. By understanding your plants’ needs, choosing the right tools, and adapting to changing conditions, you can maintain a lush, productive garden all summer long. Focus on deep, targeted watering, use mulch to conserve moisture, and avoid common mistakes that waste water and harm plants.

    With these strategies, you’ll not only survive the heat—you’ll thrive. Your vegetables will stay hydrated, your soil will stay healthy, and your harvest will reflect the care you’ve invested. Start implementing these tips today, and watch your garden flourish even under the hottest sun.

  • How to Start Raising Backyard Chickens for Beginners

    How to Start Raising Backyard Chickens for Beginners

    Thinking about raising backyard chickens for beginners? You’re not alone. More people than ever are discovering the joy, sustainability, and fresh eggs that come with keeping a small flock in their own yard. Whether you live on a suburban lot or a rural homestead, starting a backyard chicken flock is simpler than it seems—if you know the basics. This guide walks you through every essential step, from choosing the right breed to building a safe coop, so you can raise happy, healthy chickens with confidence.

    Why Raise Backyard Chickens?

    Backyard chickens offer more than just fresh eggs. They reduce food waste by eating kitchen scraps, naturally fertilize your garden, and provide endless entertainment with their quirky personalities. For beginners, chickens are surprisingly low-maintenance compared to other livestock. With proper care, a single hen can lay up to 300 eggs per year—plenty for a family of four.

    Beyond practical benefits, raising chickens fosters a deeper connection to your food source. Watching chicks grow into productive layers teaches responsibility and offers a rewarding hobby for all ages. Plus, many cities now allow backyard flocks, making it easier than ever to get started.

    How to Start Raising Backyard Chickens: Step-by-Step

    1. Check Local Laws and Regulations

    Before buying chickens, verify your local zoning laws. Some municipalities require permits, limit flock size, or prohibit roosters due to noise. Homeowners’ associations may also have restrictions. A quick call to your city planning office or a search online can save you headaches later.

    Most urban and suburban areas allow hens but ban roosters. Be sure to understand setback requirements—how far your coop must be from property lines or neighboring homes. Compliance ensures peaceful coexistence with neighbors and avoids fines.

    2. Choose the Right Breed for Your Needs

    Not all chicken breeds are created equal. For beginners, select breeds known for docile temperaments, good egg production, and cold or heat tolerance—depending on your climate. Popular beginner-friendly breeds include:

    • Plymouth Rock: Hardy, friendly, and reliable layers of large brown eggs.
    • Rhode Island Red: Excellent foragers with strong egg production.
    • Orpington: Calm, cold-hardy, and great with children.
    • Sussex: Curious, adaptable, and consistent layers.
    • Leghorn: High-producing white egg layers, best for warm climates.

    Consider whether you want brown or white eggs, how much space you have, and if you plan to raise chickens for meat or just eggs. Most beginners start with 3–6 hens—enough for a steady supply without overwhelming care demands.

    3. Build or Buy a Secure Chicken Coop

    A sturdy coop is the heart of your backyard chicken setup. It protects your flock from predators, harsh weather, and provides a safe place to roost and lay eggs. When designing or selecting a coop, prioritize these features:

    • Space: Allow at least 3–4 square feet per bird inside the coop and 8–10 square feet in the outdoor run.
    • Ventilation: Good airflow prevents respiratory issues but avoid drafts at bird level.
    • Predator-proofing: Use hardware cloth (not chicken wire) on windows and vents. Bury fencing 12 inches underground to deter digging animals.
    • Nesting boxes: Provide one box for every 3–4 hens, filled with clean straw or wood shavings.
    • Roosting bars: Chickens prefer to sleep off the ground—install perches 2–3 feet high.

    You can build a coop yourself using reclaimed materials or purchase a pre-made model. DIY coops allow customization, while store-bought options offer convenience. Whichever route you take, ensure it’s easy to clean and accessible for daily care.

    4. Set Up a Safe Outdoor Run

    Chickens need outdoor time to forage, dust bathe, and exercise. A secure run attached to your coop gives them freedom without exposure to dangers. Cover the top with netting or wire to prevent hawks and raccoons from reaching in.

    If space is limited, consider a mobile chicken tractor—a portable coop that you can move around your yard. This allows chickens to graze fresh grass regularly, improving their diet and reducing parasite buildup. Rotate the tractor weekly to keep the ground healthy.

    5. Provide Proper Nutrition and Water

    A balanced diet is crucial for egg production and overall health. Start with a high-quality starter feed for chicks, then transition to layer feed once they begin laying (usually around 18–20 weeks). Layer feed contains extra calcium for strong eggshells.

    Supplement their diet with kitchen scraps like vegetable peels, fruit, and grains—but avoid avocado, chocolate, onions, and salty foods. Offer crushed oyster shells or limestone grit for calcium, and provide fresh water daily in a clean, tip-proof container.

    Chickens drink more than you might think—about a quart per bird per week. Use a waterer with a base that prevents contamination from droppings. In winter, use a heated base to keep water from freezing.

    6. Maintain Cleanliness and Health

    Cleanliness prevents disease and keeps your flock thriving. Remove wet or soiled bedding weekly and replace it with fresh straw or pine shavings. Deep clean the coop every few months with a vinegar-water solution or poultry-safe disinfectant.

    Check your chickens daily for signs of illness: lethargy, loss of appetite, labored breathing, or changes in droppings. Isolate sick birds immediately and consult a veterinarian experienced with poultry. Preventative care includes regular deworming and monitoring for mites or lice.

    Establish a routine: collect eggs twice daily, refill feed and water, and observe behavior. Consistency builds trust and helps you spot issues early.

    Common Mistakes Beginners Should Avoid

    Even with the best intentions, new chicken keepers often make avoidable errors. One common mistake is overcrowding the coop, which leads to stress, feather pecking, and disease. Stick to recommended space guidelines.

    Another pitfall is underestimating predator threats. Raccoons, foxes, dogs, and even neighborhood cats can harm chickens. Always lock the coop at night and use secure latches—raccoons can open simple hooks.

    Don’t skip quarantine for new birds. Introducing unquarantined chickens can spread diseases like avian flu or mites to your existing flock. Isolate new arrivals for at least 30 days before integrating them.

    Finally, avoid overfeeding treats. While chickens love scratch grains and mealworms, these should make up no more than 10% of their diet. Too many treats can lead to obesity and reduced egg production.

    Seasonal Care Tips for Backyard Chickens

    Spring and Summer

    Warmer months mean more foraging and egg production—but also heat stress. Provide shade in the run, extra water, and frozen treats like watermelon or ice blocks to keep chickens cool. Ensure adequate ventilation in the coop to prevent overheating.

    Check for mites and lice regularly, as populations spike in warm weather. Dust baths with diatomaceous earth can help control parasites naturally.

    Fall and Winter

    As daylight decreases, egg production may slow. Consider using a low-wattage LED light in the coop (no more than 4–6 hours of extra light per day) to maintain laying, but avoid over-lighting, which can stress birds.

    In cold climates, insulate the coop without sealing it completely—chickens need airflow to prevent moisture buildup. Use a heated waterer and provide extra bedding for warmth. Avoid heating the entire coop; chickens adapt well to cold if dry and draft-free.

    Key Takeaways for Beginner Chicken Keepers

    • Start small with 3–6 hens of beginner-friendly breeds.
    • Always check local laws before purchasing chickens.
    • Invest in a secure, well-ventilated coop and predator-proof run.
    • Feed a balanced layer diet and provide constant access to clean water.
    • Maintain cleanliness and monitor health daily.
    • Avoid overcrowding, over-treating, and skipping quarantine.
    • Adjust care seasonally to support year-round well-being.

    Frequently Asked Questions

    How many chickens should I start with as a beginner?

    Most experts recommend starting with 3 to 6 hens. This number provides enough eggs for a small family without overwhelming your time or space. It also allows you to learn chicken behavior and care routines before expanding your flock.

    Do I need a rooster for my hens to lay eggs?

    No. Hens lay eggs naturally without a rooster. A rooster is only necessary if you want fertilized eggs for breeding. Since roosters are noisy and often prohibited in residential areas, most backyard flocks consist of hens only.

    How often do backyard chickens lay eggs?

    Healthy hens typically lay 4–6 eggs per week, depending on breed, age, and season. Younger hens (under 2 years) are most productive. Egg production slows in winter due to shorter daylight hours but can be gently supported with supplemental lighting.

    Final Thoughts

    Raising backyard chickens for beginners is a fulfilling journey that combines practicality, sustainability, and simple joys. With the right preparation, a little knowledge, and consistent care, your flock will reward you with fresh eggs, natural pest control, and endless entertainment. Start small, stay informed, and enjoy the clucks and coos of your new feathered friends. Your backyard—and your breakfast—will never be the same.

  • How to Dehydrate Vegetables from Your Garden: A Complete Step-by-Step Guide

    How to Dehydrate Vegetables from Your Garden: A Complete Step-by-Step Guide

    Harvesting a bountiful garden is one of life’s greatest joys—until you’re overwhelmed by zucchini, tomatoes, and beans all ripening at once. Instead of letting your hard-earned produce go to waste, learn how to dehydrate vegetables from your garden. This simple, cost-effective preservation method locks in nutrients, extends shelf life, and gives you pantry-ready ingredients for soups, stews, snacks, and more—all year round.

    Dehydrating garden vegetables isn’t just about saving space or avoiding spoilage. It’s a sustainable way to reduce food waste, boost your self-reliance, and enjoy the flavors of summer long after the growing season ends. Whether you’re a seasoned gardener or a first-time preserver, this guide will walk you through every step—from selecting the best veggies to storing your dried harvest properly.

    Why Dehydrate Garden Vegetables?

    Preserving your garden’s abundance through dehydration offers more than just convenience. It’s a smart, healthy, and eco-friendly choice. Unlike canning or freezing, dehydrating requires minimal energy and no added preservatives. The process removes moisture, which inhibits the growth of bacteria, mold, and yeast—naturally extending freshness without chemicals.

    Dried vegetables retain most of their vitamins and minerals, especially when processed correctly. They’re lightweight, compact, and perfect for camping, emergency kits, or quick meal prep. Plus, dehydrated veggies often develop a more concentrated flavor, enhancing soups, sauces, and stir-fries with rich, earthy notes.

    For gardeners, dehydration turns seasonal gluts into long-term assets. Imagine pulling out sun-dried tomatoes in January or rehydrating garden-grown carrots for a winter stew—all from your own backyard. It’s a rewarding way to honor your harvest and stretch your gardening investment.

    Best Vegetables to Dehydrate from Your Garden

    Not all vegetables dehydrate equally. Some retain texture and flavor beautifully, while others become tough or lose nutritional value. Focus on varieties that are naturally low in moisture and high in fiber. The best candidates include:

    • Tomatoes – Ideal for sun-drying or oven dehydration; perfect for sauces and seasoning blends.
    • Carrots – Sweet and crisp when dried; great for soups and snacks.
    • Bell Peppers – Retain vibrant color and mild heat; excellent in spice mixes.
    • Zucchini and Summer Squash – Slice thinly to prevent rubbery texture.
    • Green Beans – Blanch first to preserve color and reduce cooking time later.
    • Onions and Garlic – Essential for flavoring dishes; store in airtight containers.
    • Beets – Earthy and sweet when dried; slice uniformly for even drying.
    • Cabbage and Kale – Great for kale chips or adding to grain bowls.

    Avoid high-water-content vegetables like cucumbers, lettuce, or celery—they don’t dehydrate well and may spoil during the process. Also, steer clear of overly mature or damaged produce, as it can harbor mold or uneven moisture.

    Essential Tools for Dehydrating Garden Vegetables

    You don’t need fancy equipment to start dehydrating, but having the right tools makes the process faster, safer, and more consistent. Here’s what you’ll need:

    1. Food Dehydrator

    This is the gold standard for home dehydration. Electric dehydrators offer precise temperature control, even airflow, and timers. Look for models with adjustable trays and a temperature range of 95°F to 160°F (35°C to 71°C). They’re ideal for beginners and ensure uniform drying.

    2. Oven

    If you don’t own a dehydrator, your oven can work in a pinch. Set it to the lowest temperature (usually 140°F to 170°F or 60°C to 77°C) and prop the door open slightly with a wooden spoon to allow moisture to escape. Rotate trays every hour for even drying. Note: ovens consume more energy and may not dry as evenly.

    3. Sun-Drying (Traditional Method)

    In hot, dry climates with low humidity, sun-drying is a zero-energy option. Place sliced vegetables on mesh screens or baking sheets covered with cheesecloth to protect from insects. Turn pieces regularly and bring them indoors at night to avoid dew. This method works best for tomatoes, peppers, and herbs.

    4. Preparation Tools

    Sharp knife, cutting board, vegetable peeler, mandoline slicer (for even thickness), and a large bowl for blanching. A food processor can also help with uniform slicing, especially for onions or carrots.

    5. Storage Containers

    Once dried, store vegetables in airtight glass jars, Mylar bags, or vacuum-sealed pouches. Add oxygen absorbers to extend shelf life. Label each container with the vegetable type and date.

    Step-by-Step Guide to Dehydrating Garden Vegetables

    Follow these steps to ensure your garden vegetables dehydrate safely and effectively. Proper preparation and drying techniques are key to preserving quality, flavor, and nutrition.

    Step 1: Harvest and Select

    Pick vegetables at peak ripeness—firm, vibrant, and free of blemishes. Avoid overripe or damaged produce, as it may contain excess moisture or mold. Wash thoroughly under cool running water to remove dirt, pesticides, and insects.

    Step 2: Prep for Drying

    Trim stems, leaves, and any bruised areas. Peel if desired (e.g., carrots, beets). Slice vegetables uniformly—about ¼ inch (6 mm) thick—to ensure even drying. Thinner slices dry faster but may become brittle; thicker pieces retain more texture.

    For vegetables like green beans or zucchini, consider blanching first. Briefly immerse in boiling water for 1–3 minutes, then plunge into ice water. This preserves color, softens fibers, and deactivates enzymes that cause spoilage.

    Step 3: Arrange on Trays

    Place slices in a single layer on dehydrator trays, leaving space between pieces for airflow. Avoid overlapping. If using an oven, use wire racks over baking sheets to allow heat circulation.

    Step 4: Set Temperature and Time

    Different vegetables require different drying conditions. Use these general guidelines:

    • Tomatoes: 135°F (57°C) for 6–12 hours
    • Carrots: 125°F (52°C) for 8–10 hours
    • Bell Peppers: 125°F (52°C) for 6–10 hours
    • Zucchini: 125°F (52°C) for 8–12 hours
    • Green Beans: 125°F (52°C) for 6–10 hours (after blanching)
    • Onions: 135°F (57°C) for 6–10 hours
    • Garlic: 125°F (52°C) for 4–6 hours

    Check periodically. Vegetables are done when they’re leathery or brittle, with no moisture when bent. They should not feel sticky or soft.

    Step 5: Condition the Dried Vegetables

    This crucial step prevents mold. After drying, let vegetables cool completely. Then, place them in glass jars and seal for 7–10 days. Shake or stir daily. If condensation forms, re-dry immediately. This ensures all pieces are uniformly dry.

    Step 6: Store Properly

    Transfer conditioned vegetables to airtight containers. Store in a cool, dark, dry place—away from heat and light. Properly dehydrated vegetables can last 6–12 months, sometimes longer if vacuum-sealed with oxygen absorbers.

    Tips for Successful Vegetable Dehydration

    Achieving perfect results takes practice, but these expert tips will help you avoid common pitfalls:

    • Slice Evenly: Use a mandoline or food processor for consistent thickness. Uneven slices lead to some pieces drying too fast while others remain moist.
    • Don’t Overload Trays: Crowding reduces airflow and increases drying time. Work in batches if needed.
    • Rotate Trays: In dehydrators or ovens, rotate trays every 2–3 hours for even exposure.
    • Monitor Humidity: High humidity slows drying. Use a dehumidifier or choose a dry, well-ventilated area.
    • Taste Test: Sample a piece halfway through. If it’s still chewy, give it more time.
    • Label Everything: Include the vegetable name and date. You’ll thank yourself later.

    Creative Ways to Use Dehydrated Garden Vegetables

    Don’t let your dried harvest collect dust. These versatile ingredients can transform everyday meals:

    • Soup and Stew Base: Rehydrate carrots, onions, and celery in broth for instant mirepoix.
    • Homemade Vegetable Powder: Grind dried tomatoes, peppers, or spinach into a fine powder. Use as a seasoning for pasta, popcorn, or scrambled eggs.
    • Trail Mix Add-Ins: Toss dried zucchini or beet chips into savory trail mixes.
    • Stuffing and Casseroles: Add rehydrated vegetables to stuffing, lasagna, or baked ziti.
    • Vegetable Chips: Thinly slice and dehydrate kale, sweet potatoes, or radishes for healthy snacks.
    • Seasoning Blends: Mix dried garlic, onion, and herbs into custom spice mixes.

    To rehydrate, simply soak dried vegetables in warm water for 20–30 minutes, or add them directly to soups and stews during the last 15 minutes of cooking.

    Key Takeaways

    • Dehydrating vegetables from your garden preserves nutrients, reduces waste, and extends shelf life.
    • Best vegetables to dehydrate include tomatoes, carrots, peppers, zucchini, beans, onions, and garlic.
    • Use a food dehydrator, oven, or sun-drying method depending on your resources and climate.
    • Proper preparation—slicing evenly, blanching when needed, and conditioning—ensures safe, high-quality results.
    • Store dried vegetables in airtight containers in a cool, dark place for up to a year.
    • Get creative with rehydrated veggies in soups, snacks, seasonings, and more.

    FAQ: Dehydrating Garden Vegetables

    How long do dehydrated vegetables last?

    When stored properly in airtight containers in a cool, dark place, most dehydrated vegetables last 6 to 12 months. Using oxygen absorbers or vacuum sealing can extend shelf life up to 18 months.

    Can I dehydrate vegetables without a dehydrator?

    Yes. You can use your oven on the lowest setting with the door slightly open, or sun-dry in hot, dry climates. However, a dedicated dehydrator provides the most consistent and energy-efficient results.

    Do dehydrated vegetables lose nutrients?

    Some heat-sensitive vitamins like vitamin C may degrade during drying, but most minerals, fiber, and antioxidants remain intact. Blanching and low-temperature drying help preserve nutritional value.

    Conclusion

    Learning how to dehydrate vegetables from your garden is a game-changer for any home grower. It’s a simple, sustainable way to preserve your harvest, reduce food waste, and enjoy garden-fresh flavors all year. With the right tools, techniques, and a little patience, you can turn summer’s abundance into pantry staples that last.

    Start small—try dehydrating a batch of tomatoes or carrots this season. As you gain confidence, expand to other vegetables and experiment with flavor combinations. Before you know it, you’ll have a well-stocked, self-sufficient kitchen powered by your own backyard.

    Your garden gives so much. Now, give back by preserving its gifts the right way.

  • How to Set Up a Rain Barrel for Garden Watering

    How to Set Up a Rain Barrel for Garden Watering

    Want to save money, reduce water waste, and keep your garden thriving—even during dry spells? Setting up a rain barrel for garden watering is one of the simplest, most effective ways to harness nature’s bounty. By collecting rainwater from your roof, you can provide your plants with chemical-free hydration while lowering your utility bill and environmental footprint. This guide walks you through every step of installing a rain barrel system that’s safe, efficient, and built to last.

    Why Use a Rain Barrel for Garden Watering?

    Rainwater is naturally soft, free of chlorine, fluoride, and other additives found in tap water—making it ideal for nurturing healthy soil and vibrant plants. Unlike municipal water, rainwater has a balanced pH and carries beneficial microorganisms that support root development. Using a rain barrel also reduces stormwater runoff, which can carry pollutants into local waterways.

    Beyond environmental benefits, rain barrels offer practical advantages. They decrease reliance on treated water, especially during summer months when outdoor watering spikes. A single 55-gallon barrel can save hundreds of gallons over a season, translating into real savings on your water bill. Plus, it’s a low-cost, DIY-friendly project that most homeowners can complete in an afternoon.

    Choosing the Right Rain Barrel

    Not all rain barrels are created equal. When selecting one for garden watering, consider capacity, material, design, and compatibility with your downspout. Most standard barrels hold between 40 and 80 gallons—enough to water a small to medium garden for several days.

    Look for food-grade polyethylene barrels, which are UV-resistant, durable, and safe for storing water. Avoid repurposed containers that previously held chemicals or unknown substances. Many modern rain barrels come with built-in features like child-proof lids, fine mesh screens to keep out debris and mosquitoes, and spigots positioned for easy hose or watering can attachment.

    Some homeowners prefer decorative barrels that blend with landscaping, while others opt for modular systems that connect multiple barrels for greater storage. Whichever style you choose, ensure it includes an overflow valve—this redirects excess water away from your foundation during heavy rains.

    Key Features to Look For:

    • Food-safe, BPA-free plastic construction
    • Secure, lockable lid to prevent accidents and pests
    • Fine mesh screen over the inlet to filter leaves and insects
    • Brass or stainless steel spigot (plastic spigots can crack)
    • Overflow hose or connector for diverting excess water
    • Level base or stand compatibility for elevated placement

    Tools and Materials You’ll Need

    Before starting your installation, gather these essentials:

    • Rain barrel (new or properly cleaned repurposed barrel)
    • Downspout diverter kit or flexible downspout extension
    • Hacksaw or PVC cutter (for modifying downspout)
    • Drill with hole saw attachment (typically 2–3 inches)
    • Silicone sealant or waterproof caulk
    • Garden hose or soaker hose (optional, for direct watering)
    • Cinder blocks or wooden stand (to elevate the barrel)
    • Level and measuring tape
    • Work gloves and safety glasses

    Most of these items are available at hardware stores or online. If you’re using a DIY barrel (like a food-grade drum), ensure all fittings are tightly sealed to prevent leaks and contamination.

    Step-by-Step Guide to Setting Up Your Rain Barrel

    1. Select the Best Location

    Place your rain barrel directly under a downspout, ideally near garden beds for easy access. Choose a level, stable surface—concrete, pavers, or compacted gravel work well. Avoid placing it on soft ground, which can shift and cause tipping.

    Elevate the barrel on cinder blocks or a sturdy stand. Raising it just 12–18 inches creates enough gravity pressure for smooth water flow through a hose or watering can. This also prevents the spigot from sitting in puddles, reducing corrosion risk.

    2. Prepare the Downspout

    Turn off any gutter guards temporarily. Using a hacksaw, cut the downspout at a height that allows the rain barrel’s inlet to align with the flow. Most kits include a diverter that snaps or screws into place—this device splits water between the barrel and the original downspout path.

    If your downspout is vinyl, use a zip-tie or clamp to secure the diverter. For metal downspouts, screw it in place. Ensure the connection is snug to prevent leaks. The diverter should automatically redirect water back to the downspout once the barrel is full.

    3. Install the Barrel Inlet and Overflow

    Most barrels come pre-drilled, but if not, use a hole saw to cut an opening on the top or side near the top edge. Insert the inlet screen or diverter connector and seal around the edges with silicone caulk to prevent bugs and debris from entering.

    Next, drill a second hole near the top for the overflow valve. Attach a short length of hose or PVC pipe that directs excess water at least 3–5 feet away from your home’s foundation. This prevents soil erosion and basement flooding during heavy rainfall.

    4. Secure the Spigot

    Install the spigot near the bottom of the barrel using the provided gasket and nut. Tighten firmly but avoid over-tightening, which can crack plastic barrels. Apply silicone sealant around the base for added waterproofing.

    Test the seal by filling the barrel with a few gallons of water. Check for drips or leaks. If water seeps out, disassemble, re-caulk, and retighten.

    5. Connect and Test the System

    Reattach the downspout to the diverter and ensure all connections are secure. Wait for the next rainfall or simulate one with a garden hose to test flow. Water should enter the barrel smoothly, and the overflow should activate once full.

    Attach a hose to the spigot and run a quick test to confirm water flows freely. If using a soaker hose, lay it in your garden bed and let the rainwater seep directly into the soil—this reduces evaporation and targets roots efficiently.

    Maintaining Your Rain Barrel for Long-Term Use

    A well-maintained rain barrel can last 5–10 years. Regular upkeep prevents clogs, algae growth, and mosquito breeding.

    Clean the barrel at least twice a year—once in spring before peak use and again in fall after the growing season. Empty it completely, scrub the interior with a vinegar-water solution, and rinse thoroughly. Remove and rinse the inlet screen and spigot to clear debris.

    In winter, drain the barrel and store it upside down or indoors if you live in a freezing climate. Standing water can freeze, expand, and crack the container. Disconnect the downspout diverter to prevent ice buildup in gutters.

    Inspect seals and fittings annually. Replace worn gaskets or corroded spigots promptly. Keep the area around the barrel clear of leaves and standing water to discourage pests.

    Safety Tips for Rain Barrel Usage

    While rainwater is great for gardens, it’s not safe for drinking, cooking, or pet consumption unless properly filtered and treated. Always label your barrel “Non-Potable Water – For Garden Use Only.”

    Ensure the lid is secure to prevent children or pets from falling in. A 55-gallon barrel filled with water weighs over 450 pounds—enough to cause serious injury. Use child-proof locks if necessary.

    Mosquitoes can breed in stagnant water. Fine mesh screens on inlets and overflows are your first line of defense. Add a tablespoon of vegetable oil to the water surface to suffocate larvae, or use a bacterial larvicide labeled safe for wildlife.

    Maximizing Efficiency: Tips for Better Garden Watering

    Use collected rainwater during early morning or late evening to reduce evaporation. Water deeply but less frequently to encourage strong root systems.

    Pair your rain barrel with a drip irrigation system or soaker hose for targeted, efficient watering. These methods deliver water directly to plant roots, minimizing waste and fungal diseases caused by wet foliage.

    Monitor rainfall patterns and empty the barrel between storms if you expect heavy rain. This ensures maximum collection capacity and prevents overflow issues.

    Consider connecting multiple barrels in series using linking kits. This increases storage without requiring additional downspouts, ideal for larger gardens or dry regions.

    Key Takeaways

    • Rain barrels provide free, chemical-free water perfect for garden irrigation.
    • Choose a food-grade, UV-resistant barrel with a secure lid, mesh screen, and quality spigot.
    • Install on a level, elevated surface under a downspout using a diverter kit.
    • Include an overflow hose to protect your home’s foundation.
    • Maintain regularly by cleaning, inspecting seals, and winterizing in cold climates.
    • Never use rain barrel water for human or animal consumption without treatment.

    FAQ

    Can I use a rain barrel in winter?

    In freezing climates, it’s best to drain and store your rain barrel during winter months. Standing water can freeze, expand, and crack the container. Disconnect the downspout diverter and store the barrel upside down or in a garage or shed.

    Will a rain barrel attract mosquitoes?

    Mosquitoes can breed in stagnant water, but proper installation prevents this. Use fine mesh screens on all openings, keep the lid sealed, and avoid letting water sit for long periods. Adding a small amount of vegetable oil or a biological larvicide can also help.

    How much water can I collect from my roof?

    You can collect approximately 0.6 gallons of water per square foot of roof area per inch of rainfall. For example, a 1,000-square-foot roof can yield about 600 gallons during a one-inch rainstorm—enough to fill multiple barrels and significantly reduce your outdoor water use.

    Conclusion

    Setting up a rain barrel for garden watering is a smart, sustainable upgrade that pays off in healthier plants, lower bills, and a lighter environmental impact. With the right barrel, a few basic tools, and this step-by-step guide, you can start harvesting rainwater in just a few hours. Once installed, your barrel becomes a reliable ally in nurturing your garden—naturally and efficiently. Ready to make every drop count? Start collecting today.

  • How to Build a Chicken Coop from Pallets: A Step-by-Step Guide for Beginners

    How to Build a Chicken Coop from Pallets: A Step-by-Step Guide for Beginners

    Thinking about raising backyard chickens but worried about the cost of a pre-built coop? You’re not alone. Many homesteaders and urban farmers are turning to recycled materials to save money and reduce waste. One of the most practical and eco-friendly solutions is building a chicken coop from pallets. This guide walks you through every step of creating a safe, functional, and affordable chicken coop using wooden pallets—perfect for 3 to 6 hens.

    Pallets are sturdy, widely available, and often free from local businesses. With basic tools and a weekend’s effort, you can construct a cozy, predator-resistant home for your flock. Whether you’re a DIY enthusiast or a first-time chicken keeper, this project is simple, sustainable, and deeply rewarding.

    Why Build a Chicken Coop from Pallets?

    Pallets offer a unique blend of affordability, accessibility, and structural strength. Most standard pallets are made from treated or untreated softwood, which is easy to cut, nail, and assemble. Because they’re designed to carry heavy loads, they’re inherently durable—ideal for supporting the weight of nesting boxes, roosting bars, and daily foot traffic from your chickens.

    Using pallets also supports sustainability. Instead of ending up in landfills, these wooden platforms get a second life as part of your backyard ecosystem. Plus, repurposing materials reduces your carbon footprint and aligns with zero-waste living principles.

    Another advantage is customization. Pallets come in standard sizes (typically 40” x 48”), making it easy to plan dimensions. You can build a compact coop for a small yard or expand it into a larger run with additional panels. The modular design allows for flexibility in layout, ventilation, and access points.

    Materials and Tools You’ll Need

    Before you start building, gather all necessary materials and tools. This ensures a smooth workflow and prevents mid-project delays. Most items can be found at hardware stores, reclaimed from old projects, or borrowed from friends.

    You’ll need approximately 8 to 12 standard wooden pallets, depending on the size of your coop. Choose heat-treated (HT) pallets marked with “HT” rather than chemically treated ones (MB for methyl bromide), which can be toxic to chickens. Inspect each pallet for cracks, splinters, or protruding nails.

    Other essential materials include exterior-grade plywood for roofing, chicken wire or hardware cloth for predator protection, hinges and latches for doors, and non-toxic wood sealant. For the base, consider using landscape fabric or a raised wooden floor to prevent moisture buildup.

    As for tools, a circular saw or handsaw, drill, hammer, measuring tape, level, and staple gun are essential. Safety gear like gloves, goggles, and a dust mask should not be overlooked, especially when cutting or sanding wood.

    Essential Materials List

    • 8–12 heat-treated wooden pallets
    • Exterior plywood (½” thick)
    • Chicken wire or ½” hardware cloth
    • Roofing material (corrugated metal or shingles)
    • Hinges and secure latches
    • Non-toxic wood sealant or paint
    • Landscape fabric (optional for flooring)

    Essential Tools List

    • Circular saw or handsaw
    • Power drill with bits
    • Hammer and nails or screws
    • Measuring tape and carpenter’s square
    • Staple gun
    • Safety gloves, goggles, and mask

    Step-by-Step Instructions to Build a Chicken Coop from Pallets

    Now that you’re equipped with materials and tools, it’s time to build. Follow these steps carefully to ensure a sturdy, safe, and comfortable coop for your chickens. The design below accommodates 4–6 hens and includes a nesting area, roosting space, and secure run.

    Step 1: Plan Your Coop Layout

    Start by sketching a simple blueprint. Decide on the coop’s dimensions—recommended minimum is 4’ x 4’ for the enclosed area and a 4’ x 8’ run. This gives each hen about 10 square feet of outdoor space, which is essential for health and egg production.

    Consider placement. Your coop should face away from prevailing winds, receive morning sun, and be elevated slightly to avoid flooding. Avoid low-lying areas where water pools after rain.

    Also, think about access. You’ll need a human-sized door for cleaning and a smaller chicken door for the flock to enter and exit. Nesting boxes should be inside the coop, elevated off the ground but accessible for egg collection.

    Step 2: Prepare the Pallets

    Disassemble or modify pallets as needed. Some builders prefer to use pallets whole for walls, while others break them down into planks for more precise construction. If using whole pallets, ensure the gaps between slats are no wider than 3 inches to prevent chicks from escaping or predators from reaching in.

    Sand all surfaces to remove splinters. Chickens are curious and may peck at rough wood, which can lead to injury. Apply a non-toxic sealant to protect the wood from moisture and extend its lifespan.

    For the floor, build a raised platform using 2x4s and plywood. This prevents dampness and makes cleaning easier. Line the bottom with landscape fabric to deter digging pests.

    Step 3: Assemble the Frame and Walls

    Begin by constructing the base frame. Use four pallets laid flat to form a square or rectangle, securing them at the corners with screws. This creates a stable foundation. Alternatively, build a simple frame from 2x4s and attach pallet walls to it.

    Stand pallets upright to form the side and back walls. Secure them together at the corners using metal brackets or heavy-duty screws. For the front wall, leave an opening for the chicken door and human access door.

    Reinforce weak joints with additional wood strips. Chickens can be surprisingly strong, and a wobbly coop invites predators. Use a level to ensure walls are straight and the structure is balanced.

    Step 4: Install the Roof

    The roof protects your flock from rain, snow, and excessive sun. Use plywood as a base, then cover it with corrugated metal, asphalt shingles, or waterproof tarps. Ensure the roof overhangs by at least 6 inches on all sides to prevent water from seeping into the coop.

    For ventilation, leave a small gap under the roof or install screened vents near the top of the walls. Good airflow reduces ammonia buildup from droppings and prevents respiratory issues. However, avoid large openings that could allow drafts or predator entry.

    If you live in a hot climate, consider adding shade cloth or painting the roof white to reflect sunlight. In colder regions, insulate the roof with foam board or straw bales during winter months.

    Step 5: Add Doors and Access Points

    Cut a small chicken door (8” x 10”) near the base of the front wall. Frame it with wood and attach a hinged flap that opens outward. Use a simple latch to secure it at night. This door should lead directly to the outdoor run.

    For human access, build a larger door (24” wide) on the side or front. Use hinges and a secure lock to keep predators out. The door should open fully to allow easy cleaning and egg collection.

    Install nesting boxes inside the coop. These can be made from leftover pallet wood or repurposed crates. Each box should be about 12” x 12” x 12” and lined with straw or wood shavings. Place them in a quiet, dark corner to encourage laying.

    Step 6: Secure the Run and Predator Protection

    The outdoor run gives chickens space to scratch, dust bathe, and forage. Enclose it with chicken wire or hardware cloth, burying the bottom edge at least 12 inches underground to prevent digging predators like raccoons or foxes.

    Attach the wire to the pallet frame using staples or zip ties. Ensure there are no gaps or loose sections. Cover the top of the run with netting or wire to protect against hawks and owls.

    Add roosting bars inside the coop using 2x4s or rounded branches. Chickens prefer to sleep off the ground, so install bars about 2 feet high, spaced 12–18 inches apart. Avoid placing them directly over nesting boxes to prevent droppings in the eggs.

    Step 7: Final Touches and Maintenance

    Once assembled, inspect the coop for sharp edges, loose nails, or gaps. Sand down any rough spots and touch up the sealant. Add a layer of straw or wood shavings to the floor for bedding.

    Install a waterer and feeder inside the coop or run. Use elevated models to keep food and water clean. Consider adding a rainwater collection system or automatic waterer for convenience.

    Finally, introduce your chickens gradually. Allow them time to explore and adapt to their new home. Monitor behavior for signs of stress or illness, and adjust the environment as needed.

    Key Takeaways

    • Building a chicken coop from pallets is affordable, eco-friendly, and achievable with basic tools.
    • Use only heat-treated (HT) pallets to avoid toxic chemicals.
    • Ensure proper ventilation, predator protection, and easy access for cleaning.
    • A well-designed coop supports hen health, egg production, and long-term durability.
    • Regular maintenance, including bedding changes and structural checks, keeps the coop safe and functional.

    FAQ

    Are pallets safe for chicken coops?

    Yes, as long as they are heat-treated (marked “HT”) and free of chemicals, mold, or damage. Avoid pallets marked “MB” (methyl bromide), as they can be harmful to chickens.

    How many pallets do I need for a small coop?

    For a coop housing 4–6 hens, 8 to 12 standard pallets are typically sufficient. This includes walls, roof support, and nesting box materials.

    Can I build a mobile chicken coop from pallets?

    Absolutely. Add wheels to the base frame and keep the design lightweight. Mobile coops, or “chicken tractors,” allow you to rotate grazing areas and reduce lawn damage.

    Conclusion

    Building a chicken coop from pallets is a smart, sustainable way to start your backyard flock. It combines practicality with environmental responsibility, offering a low-cost solution that doesn’t compromise on quality or safety. With careful planning and attention to detail, you can create a cozy, secure home that your chickens will love—and that you’ll be proud of.

    Whether you’re raising chickens for eggs, pest control, or simply the joy of backyard farming, this DIY project empowers you to take control of your food source. So gather your pallets, grab your tools, and get building. Your future feathered friends are waiting.

  • What Is the Easiest Vegetable to Grow for Beginners?

    What Is the Easiest Vegetable to Grow for Beginners?

    If you’re just starting your gardening journey and wondering what is the easiest vegetable to grow for beginners, the answer is simple: lettuce. Yes, that crisp, leafy green you toss into salads requires minimal effort, thrives in small spaces, and grows faster than almost any other vegetable. Whether you have a backyard, a balcony, or just a sunny windowsill, lettuce is your best first crop.

    Unlike many vegetables that demand precise soil conditions, long growing seasons, or constant care, lettuce is forgiving, adaptable, and rewarding. It’s the perfect entry point for new gardeners who want quick results without frustration. In this guide, we’ll explore why lettuce tops the list of beginner-friendly vegetables, how to grow it successfully, and what other easy crops you can try once you gain confidence.

    Why Lettuce Is the Easiest Vegetable to Grow for Beginners

    Lettuce stands out as the easiest vegetable to grow for beginners due to its fast growth, low maintenance, and versatility. Most varieties mature in just 30 to 60 days, meaning you can harvest fresh leaves in less than two months. This quick turnaround keeps beginners motivated and engaged.

    It also tolerates a wide range of conditions. Lettuce grows well in both full sun and partial shade, making it ideal for urban gardens or homes with limited sunlight. It doesn’t require deep soil, so container gardening is a breeze. Plus, you can harvest it “cut-and-come-again,” meaning you snip off outer leaves while the plant continues to grow—giving you multiple harvests from a single planting.

    Fast Growth and Quick Harvest

    One of the biggest advantages of lettuce is its rapid development. Unlike tomatoes or peppers that take months to produce fruit, lettuce seedlings emerge in just 3 to 7 days. Within weeks, you’ll have tender, edible leaves ready for picking. This speed makes it ideal for beginners who want to see results without waiting.

    Leaf lettuce varieties like ‘Black Seeded Simpson’ or ‘Red Sails’ are especially quick, often ready to harvest in under 40 days. Even head-forming types like ‘Buttercrunch’ or ‘Iceberg’ are relatively fast compared to other vegetables. This quick payoff builds confidence and encourages continued gardening.

    Minimal Space Requirements

    Lettuce doesn’t need a large garden plot. It grows well in pots, window boxes, raised beds, or even repurposed containers like milk jugs or yogurt tubs. A container as small as 6 inches deep and 8 inches wide can support a healthy lettuce plant.

    This makes lettuce perfect for apartment dwellers, renters, or anyone with limited outdoor space. You can grow it on a sunny balcony, patio, or even indoors under grow lights. Its compact size and shallow root system mean you can plant multiple varieties in a single container, maximizing your harvest in minimal space.

    Low Maintenance and Few Pests

    Lettuce is not a magnet for pests like aphids or caterpillars, especially when grown in cooler weather. While slugs and snails may occasionally nibble on leaves, these issues are easily managed with organic deterrents like crushed eggshells or beer traps.

    It also requires little fertilization. A light application of compost or a balanced organic fertilizer at planting is usually enough. Over-fertilizing can lead to bolting (premature flowering), so less is often more. Watering is simple too—just keep the soil consistently moist, especially during dry spells.

    How to Grow Lettuce: A Step-by-Step Guide for Beginners

    Growing lettuce is straightforward, even if you’ve never planted a seed before. Follow these simple steps to get started and enjoy fresh, homegrown greens in no time.

    Choose the Right Variety

    Not all lettuce is created equal. For beginners, leaf lettuce varieties are the best choice because they’re fast, forgiving, and allow for repeated harvests. Popular options include:

    • Black Seeded Simpson – Heat-tolerant, crinkly leaves, ready in 45 days
    • Red Sails – Attractive red-tinted leaves, mild flavor, bolt-resistant
    • Salad Bowl – Loose-leaf type with frilly edges, excellent for cut-and-come-again harvesting
    • Buttercrunch – A semi-heading variety with sweet, buttery leaves

    These varieties are widely available, disease-resistant, and perform well in most climates.

    Prepare the Growing Space

    Lettuce prefers loose, well-draining soil rich in organic matter. If planting in the ground, amend the soil with compost to improve texture and fertility. For containers, use a high-quality potting mix—avoid garden soil, which can compact and hinder root growth.

    Ensure your planting area gets at least 4 to 6 hours of sunlight per day. Morning sun with afternoon shade is ideal, especially in warmer climates. Lettuce prefers cooler temperatures (60–70°F or 15–21°C), so spring and fall are the best planting seasons in most regions.

    Sow Seeds Correctly

    Lettuce seeds are tiny and should be sown shallowly—just ¼ inch deep. Scatter seeds lightly over the soil surface and gently press them in. For rows, space seeds about 1 inch apart and thin seedlings to 6–8 inches apart once they’re 2 inches tall.

    If using containers, sprinkle seeds evenly across the surface and cover lightly with soil. Keep the soil moist until germination, which usually occurs within a week. You can also start seeds indoors 4–6 weeks before the last frost and transplant them outside when seedlings have 3–4 true leaves.

    Water and Care for Your Lettuce

    Consistent moisture is key to preventing bitterness and bolting. Lettuce has shallow roots, so it dries out quickly. Water regularly—ideally in the morning—to keep the soil evenly moist but not soggy. Mulching with straw or shredded leaves helps retain moisture and keeps roots cool.

    Avoid overhead watering if possible, as wet leaves can encourage fungal diseases. Drip irrigation or watering at the base of the plant is best. In hot weather, provide shade with a cloth or row cover to prevent the plants from bolting.

    Harvest at the Right Time

    You can begin harvesting lettuce as soon as the leaves are large enough to eat—usually when they’re 3–4 inches long. For leaf lettuce, use the “cut-and-come-again” method: snip off outer leaves with scissors, leaving the center intact. The plant will continue producing new growth for weeks.

    For head lettuce, wait until the head feels firm and full, then cut it at the base. Harvest in the morning when leaves are crisp and full of moisture. Store harvested lettuce in the refrigerator for up to a week.

    Other Easy Vegetables for Beginners to Grow

    While lettuce is the easiest vegetable to grow for beginners, several other crops are nearly as simple and rewarding. Once you’ve mastered lettuce, consider expanding your garden with these beginner-friendly options.

    Radishes

    Radishes are another top choice for new gardeners. They mature in just 25 to 30 days and can be grown in containers or garden beds. They prefer cool weather and loose, well-drained soil. Plant seeds directly in the ground ½ inch deep and 1 inch apart. Thin seedlings to 2 inches apart once they sprout.

    Radishes are virtually pest-free and require minimal care. They’re also great for intercropping—plant them between slower-growing vegetables like carrots to maximize space.

    Green Beans

    Bush beans are easy to grow and don’t require staking. They thrive in full sun and well-drained soil. Sow seeds 1 inch deep and 3 inches apart after the last frost. Water regularly, especially during flowering and pod development.

    Green beans produce a generous harvest in about 50 to 60 days. They’re also nitrogen-fixing, which improves soil health for future crops.

    Zucchini

    Zucchini is incredibly productive and grows quickly in warm weather. A single plant can yield dozens of fruits. It needs full sun, rich soil, and plenty of space—plant seeds 1 inch deep and 3 feet apart.

    Water deeply once or twice a week, and harvest when fruits are 6–8 inches long. Zucchini is prone to squash bugs, so monitor plants regularly and remove pests by hand.

    Spinach

    Like lettuce, spinach is a cool-season crop that grows fast and tolerates partial shade. It’s rich in nutrients and perfect for salads, smoothies, or cooking. Sow seeds ½ inch deep in early spring or fall.

    Harvest outer leaves when they’re 3–4 inches long, or cut the entire plant at the base. Spinach bolts quickly in warm weather, so plant early and provide shade if needed.

    Common Mistakes to Avoid When Growing Lettuce

    Even the easiest vegetable to grow for beginners can fail if basic mistakes are made. Avoid these common pitfalls to ensure a successful harvest.

    Planting at the Wrong Time

    Lettuce prefers cool weather. Planting in the heat of summer often leads to bolting—when the plant sends up a flower stalk and turns bitter. To avoid this, plant lettuce in early spring or late summer for a fall harvest.

    In warmer climates, choose heat-tolerant varieties and provide afternoon shade. You can also use shade cloth or plant lettuce under taller crops like tomatoes for natural protection.

    Overcrowding Seedlings

    Lettuce needs space to grow. Overcrowded plants compete for light, water, and nutrients, leading to stunted growth and increased disease risk. Always thin seedlings to the recommended spacing—usually 6 to 8 inches apart.

    Thinning may feel wasteful, but it’s essential for healthy development. You can eat the thinned seedlings in salads—they’re tender and delicious.

    Inconsistent Watering

    Lettuce hates dry soil. Inconsistent watering causes stress, leading to bitterness and bolting. Check the soil daily, especially in containers, and water when the top inch feels dry.

    Use a moisture meter if you’re unsure, or simply stick your finger into the soil. Mulching helps maintain even moisture and reduces the need for frequent watering.

    Ignoring Soil Quality

    Lettuce grows best in fertile, well-draining soil. Poor soil leads to weak plants and poor yields. Before planting, mix in compost or aged manure to boost nutrients and improve structure.

    Avoid heavy clay soils, which retain too much water and can cause root rot. If your soil is compacted, consider raised beds or containers with quality potting mix.

    Key Takeaways

    • Lettuce is the easiest vegetable to grow for beginners due to its fast growth, low maintenance, and adaptability.
    • It thrives in small spaces, including containers, and can be harvested multiple times using the cut-and-come-again method.
    • Plant lettuce in cool weather, keep soil consistently moist, and thin seedlings to prevent overcrowding.
    • Other beginner-friendly vegetables include radishes, green beans, zucchini, and spinach.
    • Avoid common mistakes like planting in hot weather, overwatering, or using poor-quality soil.

    FAQ

    Can I grow lettuce indoors?

    Yes, lettuce grows well indoors with at least 6 hours of sunlight or under grow lights. Use a container with drainage holes and keep the soil moist. Leaf lettuce varieties are best for indoor growing.

    How often should I water lettuce?

    Water lettuce regularly to keep the soil evenly moist—usually every 1 to 2 days, depending on weather and container size. Avoid letting the soil dry out completely.

    Why is my lettuce turning bitter?

    Bitterness is usually caused by heat stress or inconsistent watering. Plant lettuce in cool weather, provide shade in summer, and maintain steady moisture to prevent bolting and bitterness.

    Conclusion

    If you’re asking what is the easiest vegetable to grow for beginners, lettuce is the clear winner. It’s fast, forgiving, and perfect for small spaces. With just a little care, you’ll enjoy fresh, homegrown greens in weeks—no green thumb required.

    Start with lettuce, build your confidence, and gradually expand to other easy crops like radishes and spinach. Gardening doesn’t have to be complicated. With the right knowledge and a bit of patience, anyone can grow their own food and enjoy the satisfaction of harvesting what they’ve nurtured.

    So grab some seeds, find a sunny spot, and begin your gardening journey today. Your first salad is just a few weeks away. Read about Car insurance and Travel and about Foods from here. Also read about Dogs , Gardening and Savinghabits.

  • How to Store Homegrown Onions for Winter: A Complete Guide

    How to Store Homegrown Onions for Winter: A Complete Guide

    You’ve nurtured your onion crop from seed to harvest, and now you’re staring at a pile of homegrown onions wondering how to store them so they last through the cold months. The good news? With the right techniques, you can keep your onions fresh, firm, and flavorful all winter long. Proper storage isn’t just about tossing them in a sack and hoping for the best—it’s a science that hinges on timing, curing, and environment. This guide walks you through every step to ensure your homegrown onions stay in peak condition from fall to spring.

    Why Proper Storage Matters for Homegrown Onions

    Onions are one of the most rewarding crops to grow at home, but their shelf life depends heavily on how they’re handled after harvest. Without proper storage, even the healthiest onions can sprout, rot, or dry out before winter ends. The key is to mimic the dry, cool, and dark conditions that onions naturally prefer. When stored correctly, homegrown onions can last 6 to 12 months, depending on the variety and storage method.

    Improper storage leads to moisture buildup, mold, and premature sprouting—common issues that can ruin an entire harvest. By understanding the biology of onions and the environmental factors that affect them, you can dramatically extend their usability. This isn’t just about saving money; it’s about preserving the flavor and nutrition of your garden’s bounty.

    When to Harvest Onions for Winter Storage

    Timing your harvest is the first critical step in successful onion storage. Most storage onions are ready when the tops naturally fall over and begin to yellow, usually in late summer or early fall. This signals that the bulb has stopped growing and is entering dormancy. Do not wait too long after the tops fall—overripe onions are more prone to bruising and disease.

    Avoid harvesting during wet weather. Wet soil and rain increase moisture content in the bulbs, which can lead to rot during storage. If rain is forecast, consider lifting onions a few days early and letting them cure under cover. Always handle onions gently during harvest to prevent cuts or bruises that invite pathogens.

    Signs Your Onions Are Ready to Harvest

    • Over 50% of the foliage has fallen over and turned brown
    • Stems are soft and pliable near the base
    • Bulbs feel firm when gently squeezed
    • Skin has developed a papery outer layer

    How to Cure Onions Before Storage

    Curing is the process of drying onions after harvest to seal the neck and reduce moisture content. This step is non-negotiable for long-term storage. Without proper curing, onions will not keep through winter, no matter how ideal your storage space is.

    To cure onions, lay them out in a single layer in a warm, dry, well-ventilated area out of direct sunlight. A garage, shed, or covered porch works well. Allow 10 to 14 days for full curing, depending on humidity and temperature. The goal is to dry the neck (where the stem meets the bulb) until it’s tight and papery, and the outer skin becomes crisp.

    Tips for Effective Curing

    • Turn onions every few days to ensure even drying
    • Use a fan to improve air circulation if humidity is high
    • Remove any onions with soft spots or signs of disease immediately
    • Do not wash onions before curing—soil helps protect the skin

    Choosing the Right Storage Location

    Once cured, your onions need a cool, dark, and dry place to thrive. Ideal storage temperatures range from 32°F to 40°F (0°C to 4°C), with humidity levels between 65% and 70%. Basements, root cellars, and unheated garages are excellent options. Avoid areas with temperature fluctuations or high humidity, such as kitchens or laundry rooms.

    Light is another enemy of stored onions. Exposure to light can trigger sprouting, even in cured bulbs. Store onions in complete darkness whenever possible. If you must use a lit area, keep them in opaque containers or cover them with a breathable cloth.

    Best Storage Environments for Onions

    • Root cellar with consistent cool temperatures
    • Unheated garage with insulation from freezing
    • Basement corner away from furnaces or water heaters
    • Cool pantry with good ventilation

    How to Store Homegrown Onions for Winter

    Now that your onions are cured and you’ve selected the right location, it’s time to choose a storage method. The goal is to allow airflow while protecting onions from moisture and light. There are several effective ways to store onions, each suited to different needs and spaces.

    1. Mesh Bags or Net Sacks

    Mesh bags are a popular choice because they allow maximum airflow. Use food-grade mesh bags and hang them from hooks or shelves. Label each bag with the onion variety and harvest date. Check regularly for soft or sprouting onions and remove them immediately to prevent spoilage from spreading.

    2. Wooden Crates or Baskets

    Wooden crates with slatted sides provide excellent ventilation. Stack onions in a single layer, or use dividers to prevent bruising. Avoid plastic containers unless they have ventilation holes—trapped moisture leads to rot. Line crates with newspaper or burlap for added protection.

    3. Hanging Braids or Ropes

    For a traditional and space-saving option, braid onion tops together and hang them from the ceiling. This method works best with varieties that have long, flexible stems. Ensure the braid is tight and the onions are spaced apart to allow air circulation. This method also adds a rustic charm to your storage space.

    4. Perforated Plastic Bins

    If you’re short on space, use plastic storage bins with drilled holes for airflow. Layer onions with breathable material like straw or shredded paper between layers. Do not seal the bin completely—leave the lid slightly ajar or use a mesh cover. Monitor moisture levels closely.

    Best Onion Varieties for Winter Storage

    Not all onions are created equal when it comes to storage. Some varieties naturally have thicker skins and lower moisture content, making them ideal for long-term keeping. If you’re planning ahead for next season, choose storage-friendly types.

    Long-day onions, typically grown in northern regions, tend to store better than short-day varieties. Look for names like ‘Copra’, ‘Stuttgarter’, ‘Yellow Storage’, or ‘Redwing’. These onions have dense flesh and tight necks, which slow down spoilage.

    Top Storage Onion Varieties

    • Copra: Excellent keeper, mild flavor, great for cooking
    • Stuttgarter: Reliable storage, good yield, widely adaptable
    • Yellow Storage 5: Long shelf life, strong flavor
    • Redwing: Red-skinned, stores well, adds color to dishes

    Common Mistakes to Avoid When Storing Onions

    Even experienced gardeners make storage errors that shorten onion life. Avoid these common pitfalls to maximize your harvest’s longevity.

    Storing onions near potatoes is a classic mistake. Potatoes release moisture and gases that cause onions to spoil faster. Keep them in separate areas, ideally with a barrier between them.

    Another error is overpacking. Crowding onions reduces airflow and increases the risk of rot. Always leave space between bulbs, especially in bins or crates.

    Finally, don’t refrigerate whole onions unless they’re cut. The cold, moist environment of a fridge causes onions to become soft and moldy. Only refrigerate peeled or chopped onions in airtight containers for short-term use.

    Monitoring and Maintaining Stored Onions

    Storing onions isn’t a “set it and forget it” task. Regular checks are essential to catch problems early. Inspect your stored onions every 2 to 3 weeks. Look for signs of sprouting, soft spots, mold, or shriveling.

    Remove any compromised onions immediately. One bad onion can affect others through ethylene gas or mold spores. Use older onions first, practicing a “first in, first out” system to reduce waste.

    If you notice condensation in your storage container, increase ventilation or move the onions to a drier spot. In very dry environments, lightly misting the air (not the onions) can help maintain optimal humidity.

    Key Takeaways for Storing Homegrown Onions

    • Harvest onions when tops fall over and dry in dry conditions
    • Cure onions for 10–14 days in a warm, ventilated area
    • Store in a cool (32–40°F), dark, dry place with good airflow
    • Use mesh bags, crates, or braids to allow circulation
    • Avoid storing near potatoes or in sealed plastic containers
    • Check stored onions regularly and remove any that spoil
    • Choose long-storage varieties like ‘Copra’ or ‘Stuttgarter’ for best results

    FAQ: Storing Homegrown Onions for Winter

    Can I store onions in the refrigerator?

    Whole, uncut onions should not be stored in the refrigerator. The cold, moist environment causes them to become soft and moldy. Only refrigerate peeled or chopped onions in airtight containers for up to a week.

    How long do homegrown onions last in storage?

    Properly cured and stored onions can last 6 to 12 months. Varieties with thick skins and low moisture content, like ‘Copra’, often last closer to a year. Regular monitoring helps extend their life.

    Why are my stored onions sprouting?

    Sprouting occurs when onions are exposed to light, warmth, or moisture. Ensure your storage area is dark, cool, and dry. Remove sprouted onions promptly to prevent them from drawing energy from the bulb.

    Conclusion

    Storing homegrown onions for winter doesn’t have to be complicated. With proper harvest timing, thorough curing, and the right storage conditions, you can enjoy your garden’s bounty well into the next growing season. The key is attention to detail—gentle handling, good airflow, and regular checks make all the difference.

    By following this guide, you’ll not only preserve your onions but also deepen your connection to the food you grow. There’s something deeply satisfying about reaching for a homegrown onion in the depths of winter, knowing it traveled from your garden to your pantry with care. Start your storage process today, and savor the taste of summer all year long.